Authentication providers
An authentication provider is an integration with an external service that manages user authentication and optionally user group management for Factry Historian. There are several types of authentication providers available, including Google, Microsoft, LDAP, and local authentication. For the Microsoft and LDAP authentication provider we also support the mapping of corporate user groups to local user groups in Factry Historian.
This is a step by step guide on configuring Google authentication in Factry Historian.
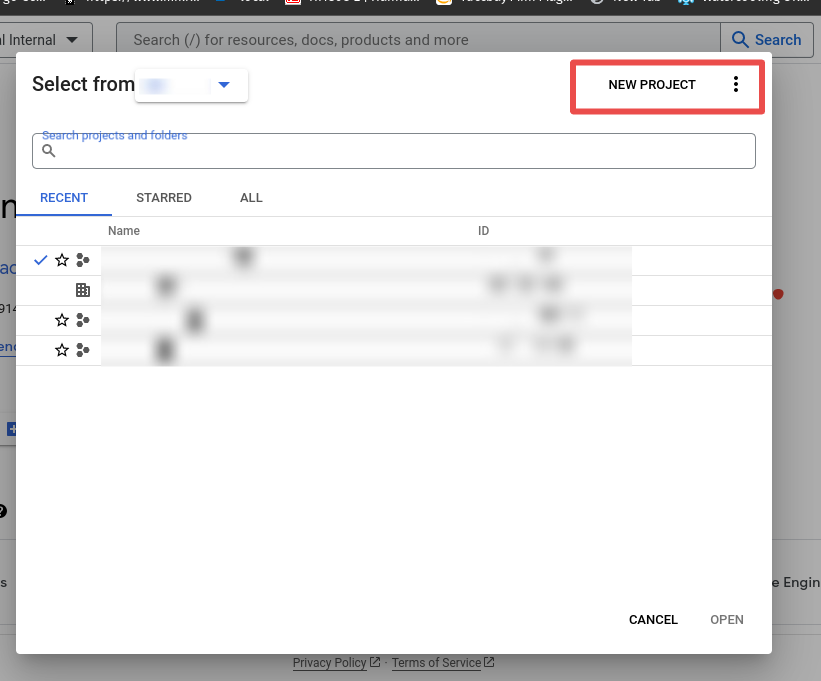
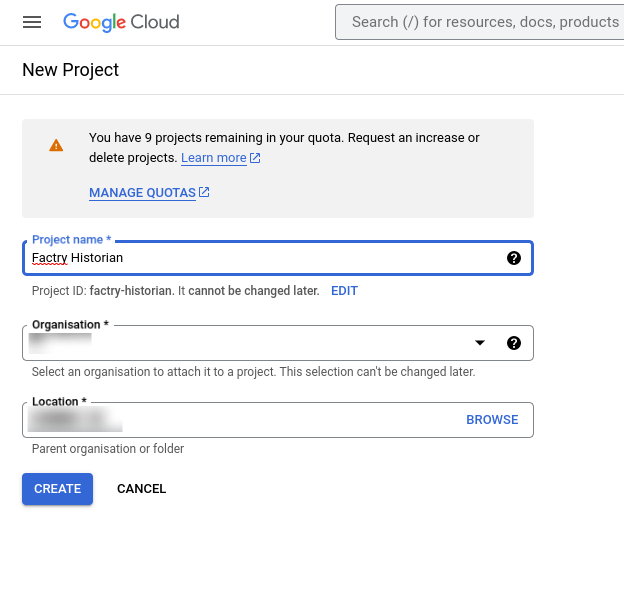
Step 1: Go to https://console.cloud.google.com/ and create a new project or open an existing one.
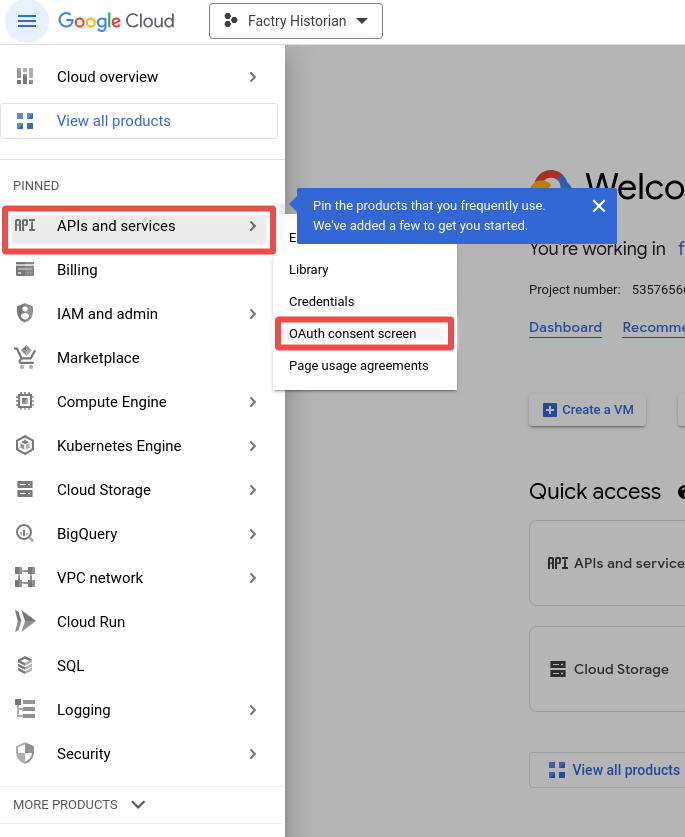
Step 2: Open the menu on the top and click on OAuth consent screen under APIs and services.
Step 3: Select User Type Internal to allow authentication of users configured within your Google organization and click Create.
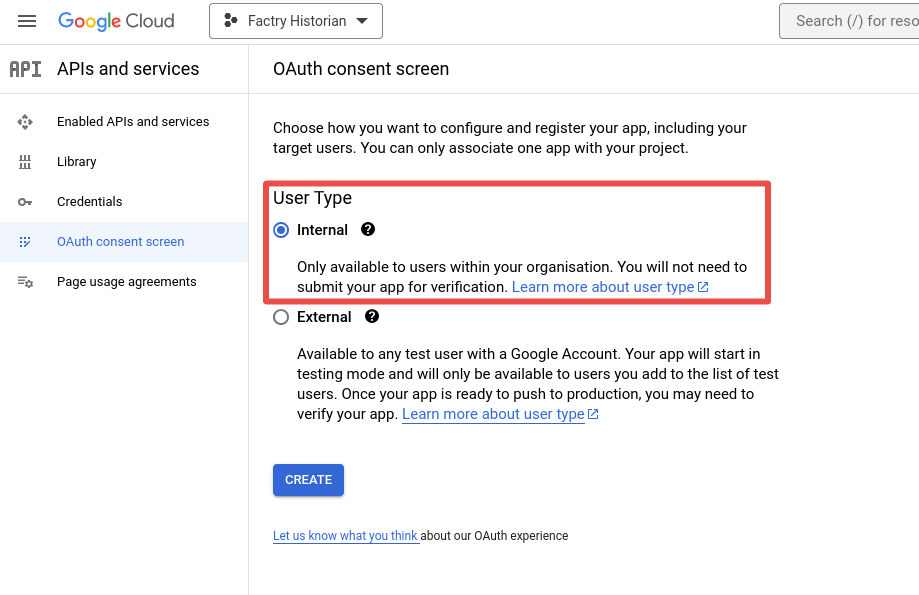
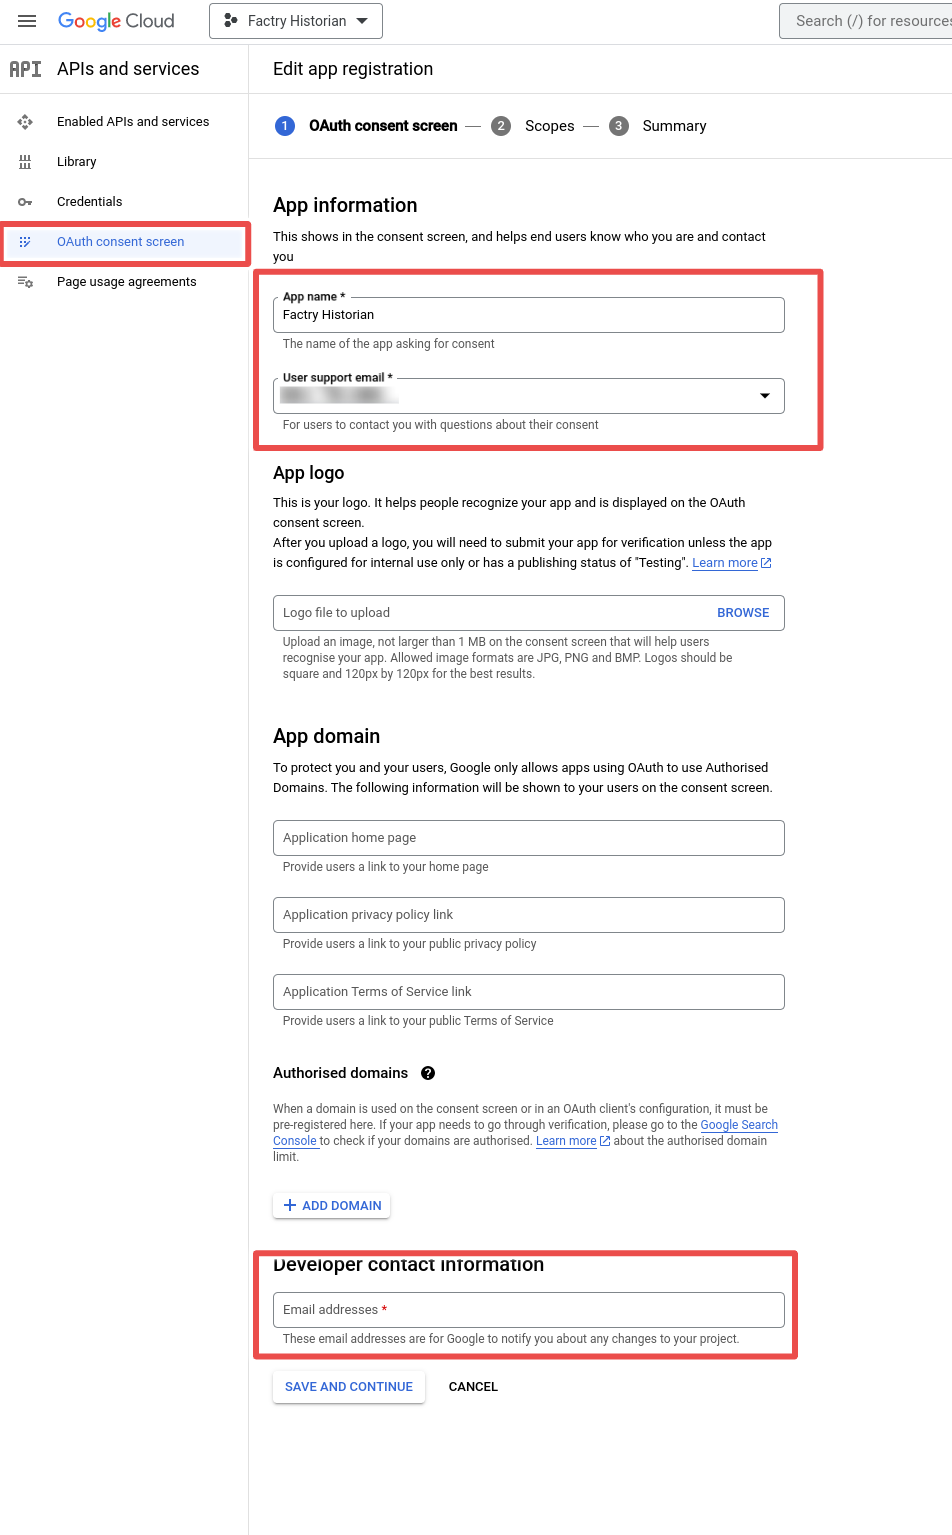
Step 4: Fill in the app information for the OAuth consent screen and leave the Scopes step empty.
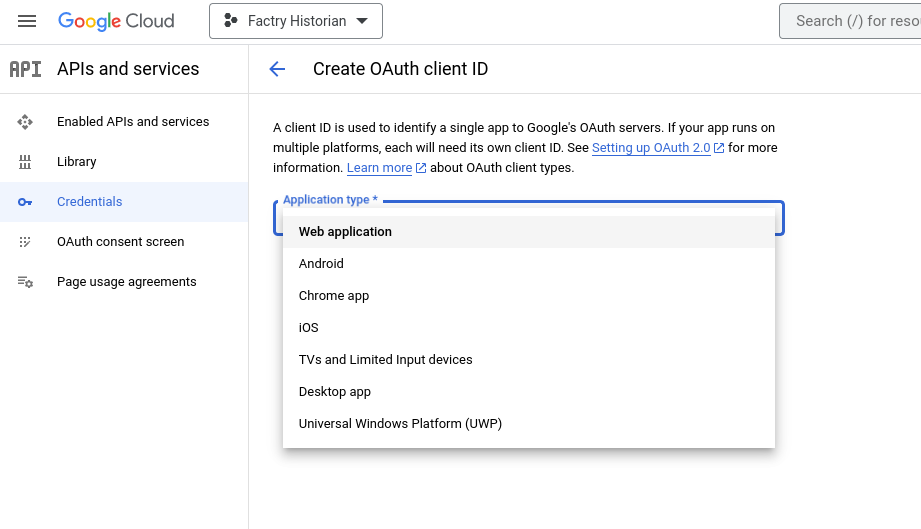
Step 5: Open the credentials menu on the left and click create credentials on top. Select OAuth client ID.

Step 6: Select Web application under Application type.
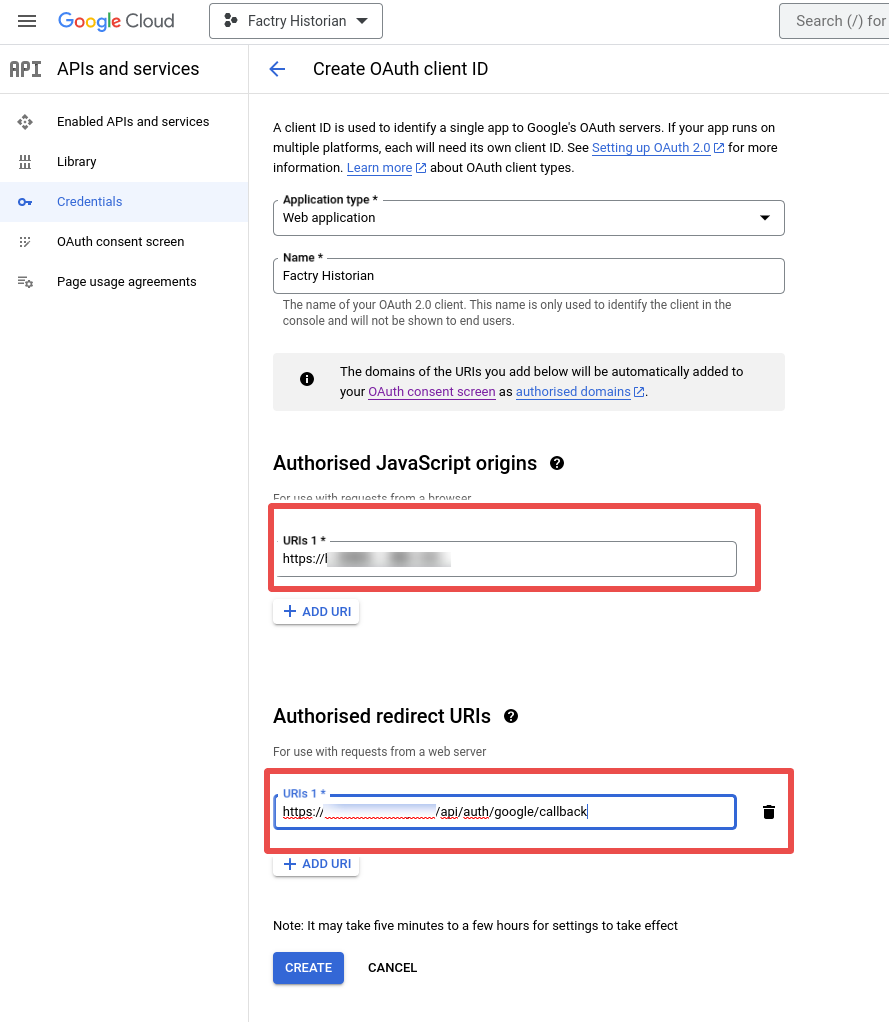
Step 7: Fill in the fully qualified domain name into Authorized Javascript Origins on which the Factry Historian web application is reachable. E.g. https://historian.mycompany.local. This should be the exact same URL as configured under Configuration -> Server Settings -> General -> BaseURL in Factry Historian. Under authorized redirect URI fill in the base URL + /api/auth/name/callback and replace name with the name you will give the authentication provider you will configure in Factry Historian. E.g. https://historian.mycompany.local/api/auth/google/callback. Finally click Create.
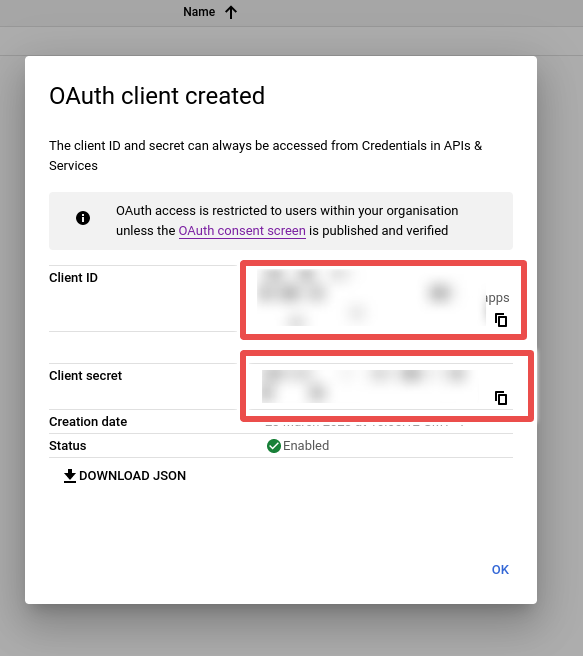
Step 8: Note the Client ID and Client Secret.
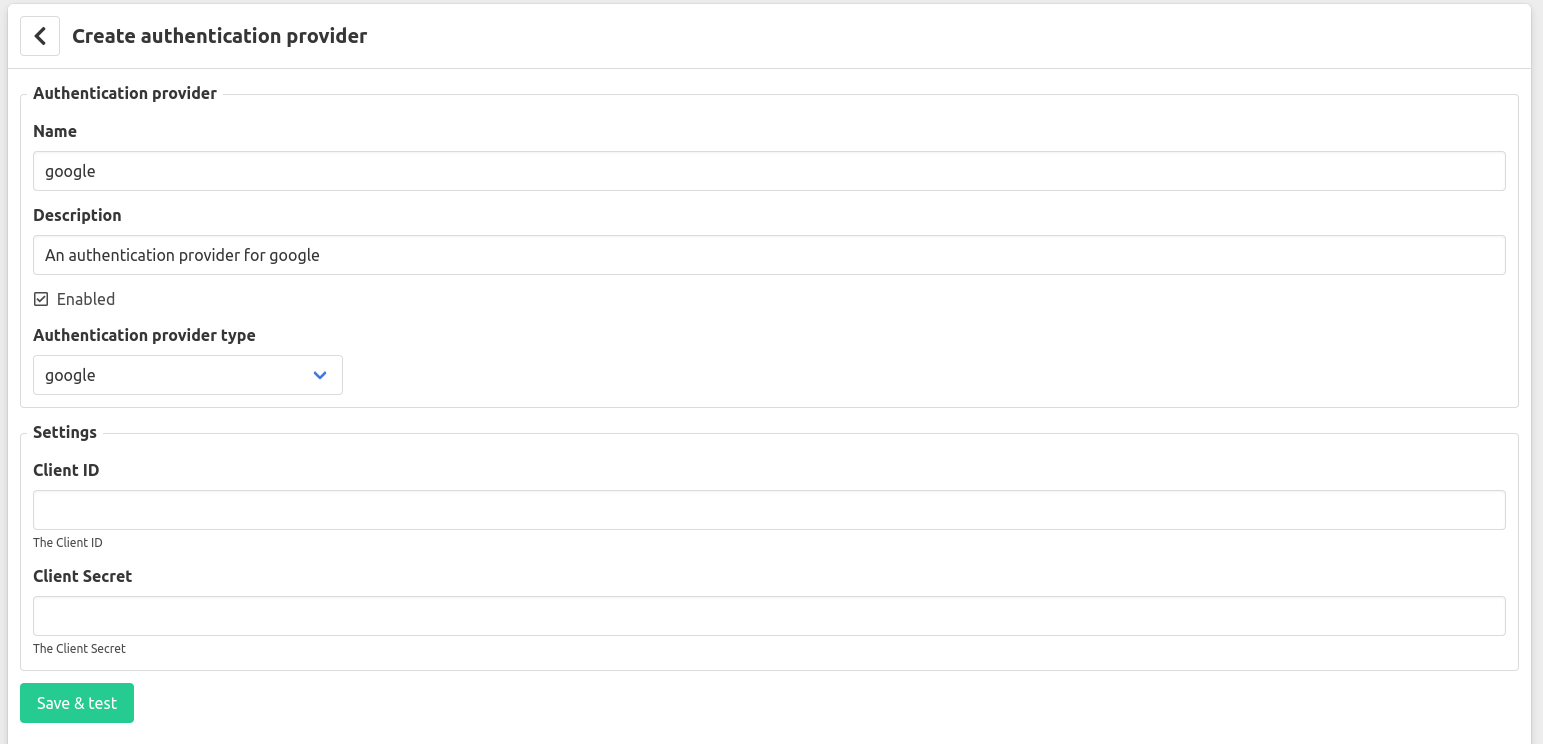
Step 9: Go to the administration interface of Factry Historian and go to Configuration -> Server Settings -> Authentication Providers and click the Create provider button. Fill in the name, Client ID and Client secret from the previous steps and click save.
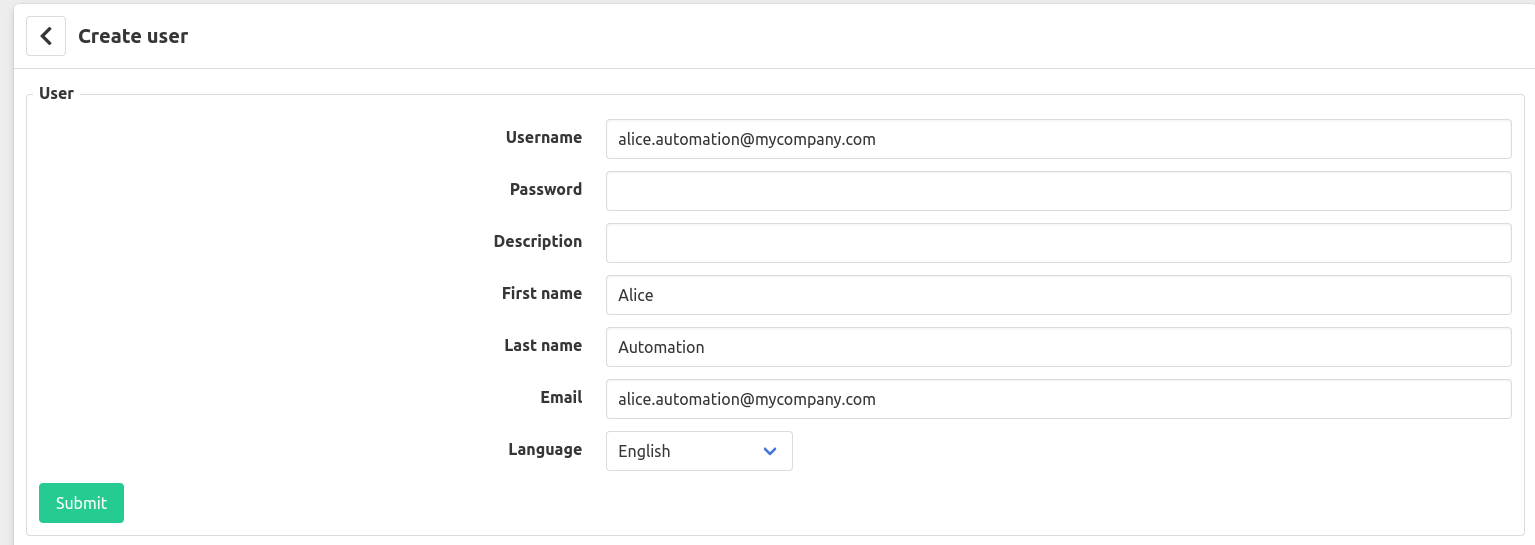
Step 10: In order to allow users to use Google Authentication you will need to create users in Factry Historian with a username equal to their Google login.
Microsoft
This is a step by step guide on configuring Microsoft authentication in Factry Historian.
Step 1: Go to https://portal.azure.com and click on Azure Active Directory

Step 2: Click Add -> App registration

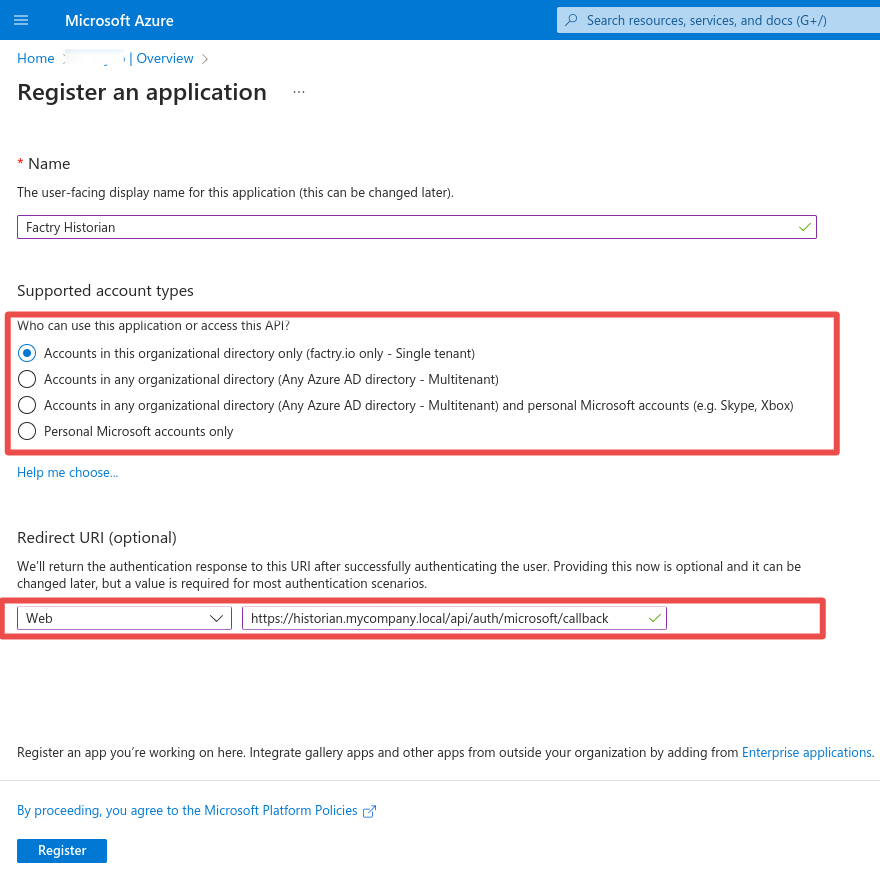
Step 3: Fill in the name of the application and select the supported account types (we suggest choosing the first option - Single tenant). Fill in the redirect URI being the base URL + /api/auth/name/callback and replace name with the name you will give the authentication provider you will configure in Factry Historian. E.g. https://historian.mycompany.local/api/auth/microsoft/callback. The base URL should be the exact same URL as configured under Configuration -> Server Settings -> General -> BaseURL in Factry Historian and must be a fully qualified domain name on which the Factry Historian web application is reachable. Click Create.
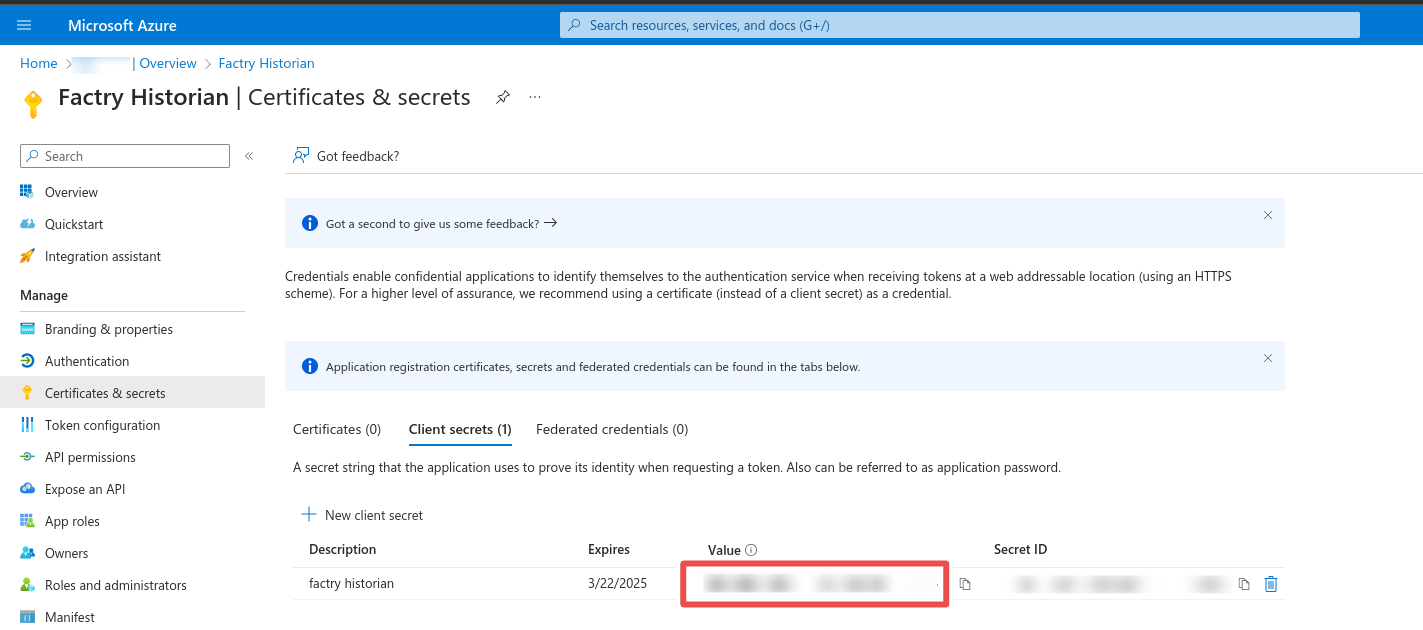
Step 4: Note the Application (client) ID and the Directory (tenant) ID. These values will be used when creating the authentication provider in Factry Historian. Next click Add a certificate or secret. Under client secrets click on New client secret


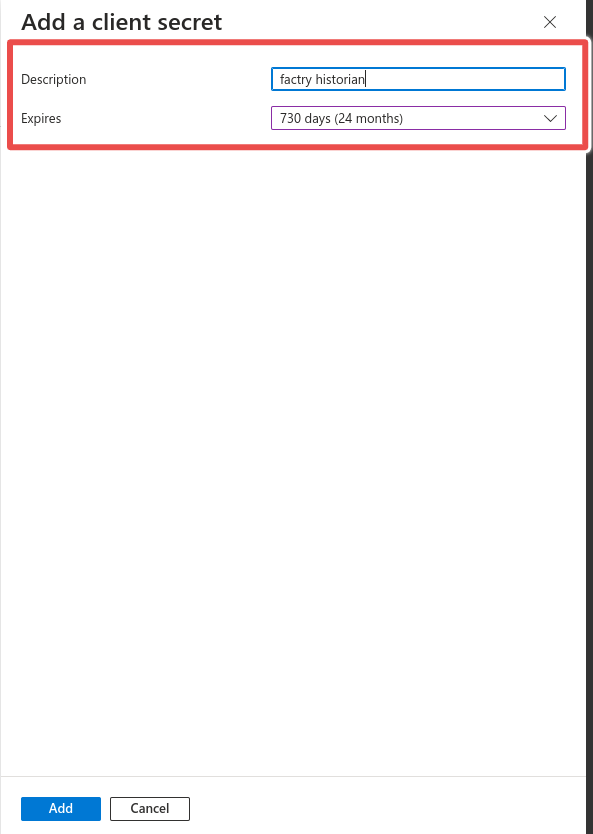
Step 5: Enter a name and expiration date for the client secret and click Add. Note the value of the generated client secret.
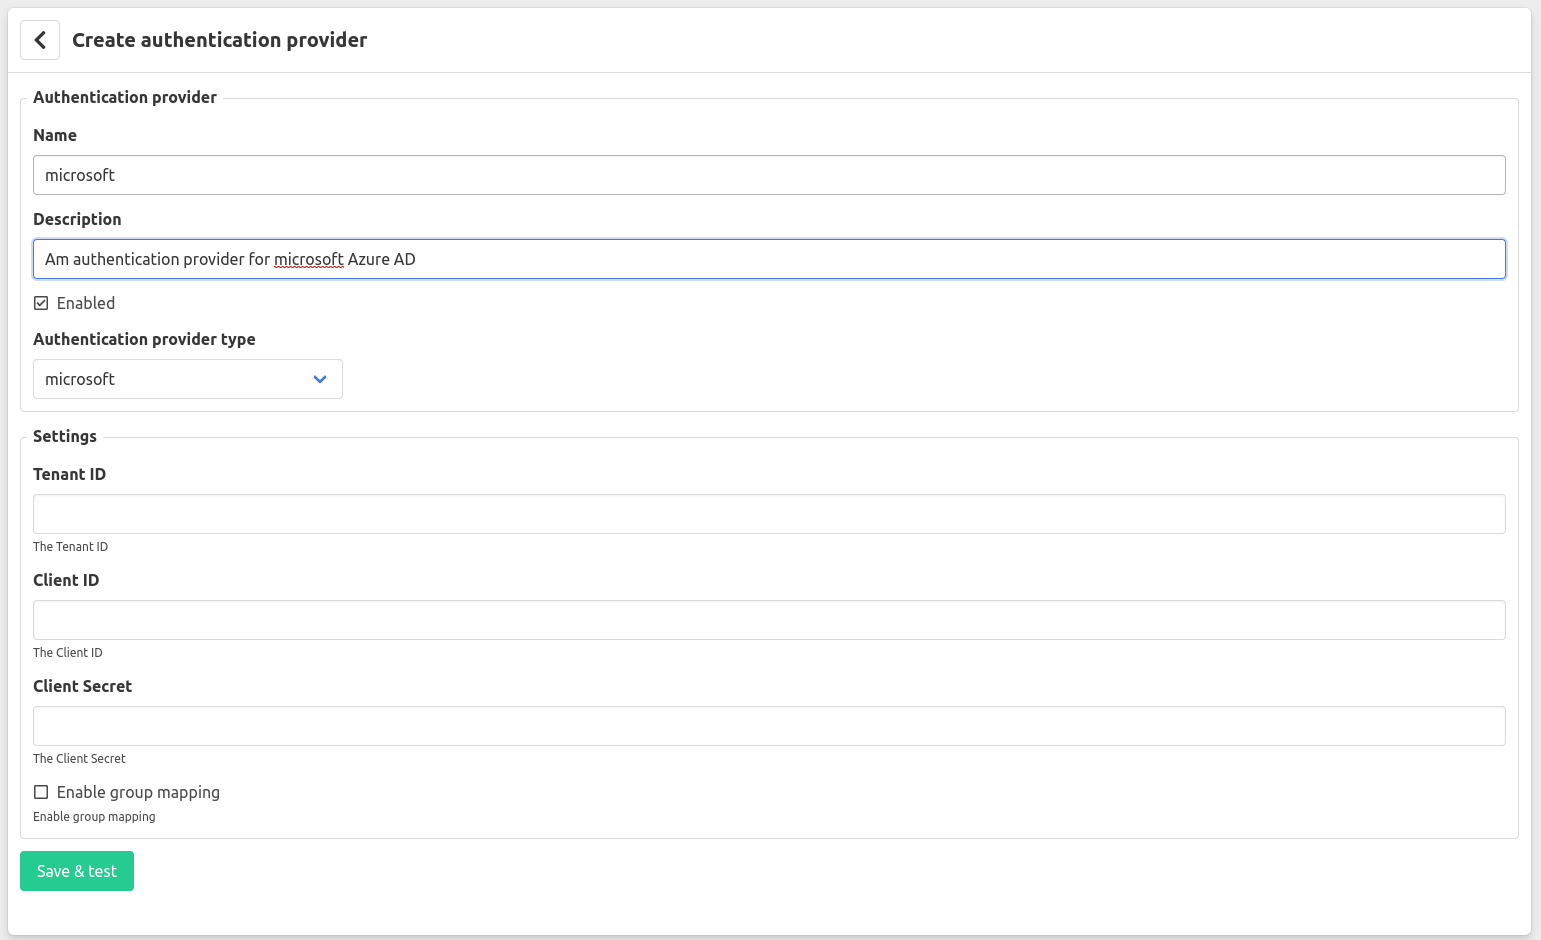
Step 6: Go to the administration interface of Factry Historian and goto Configuration -> Server Settings -> Authentication Providers and click the Create provider button. Fill in the Name, Tenant ID, Client ID and Client Secret from the previous steps. Select whether or not you wish to enable group mapping. Finally click Save & test.
- Tenant ID: The unique identifier of your tenant. If left blank
commonwill be used. - Client ID: The client ID, the identifier for the application.
- Client Secret: The secret corresponding with the client ID.
- Enable group mapping: Check this if you wish to use the membership of security groups in Azure to infer the group membership of a user in Factry Historian.
LDAP
In order to configure LDAP authentication go to Configuration -> Server Settings -> Authentication Providers in Factry Historian and click the Create provider button. Select LDAP in the list of authentication provider types and configure the necessary fields.
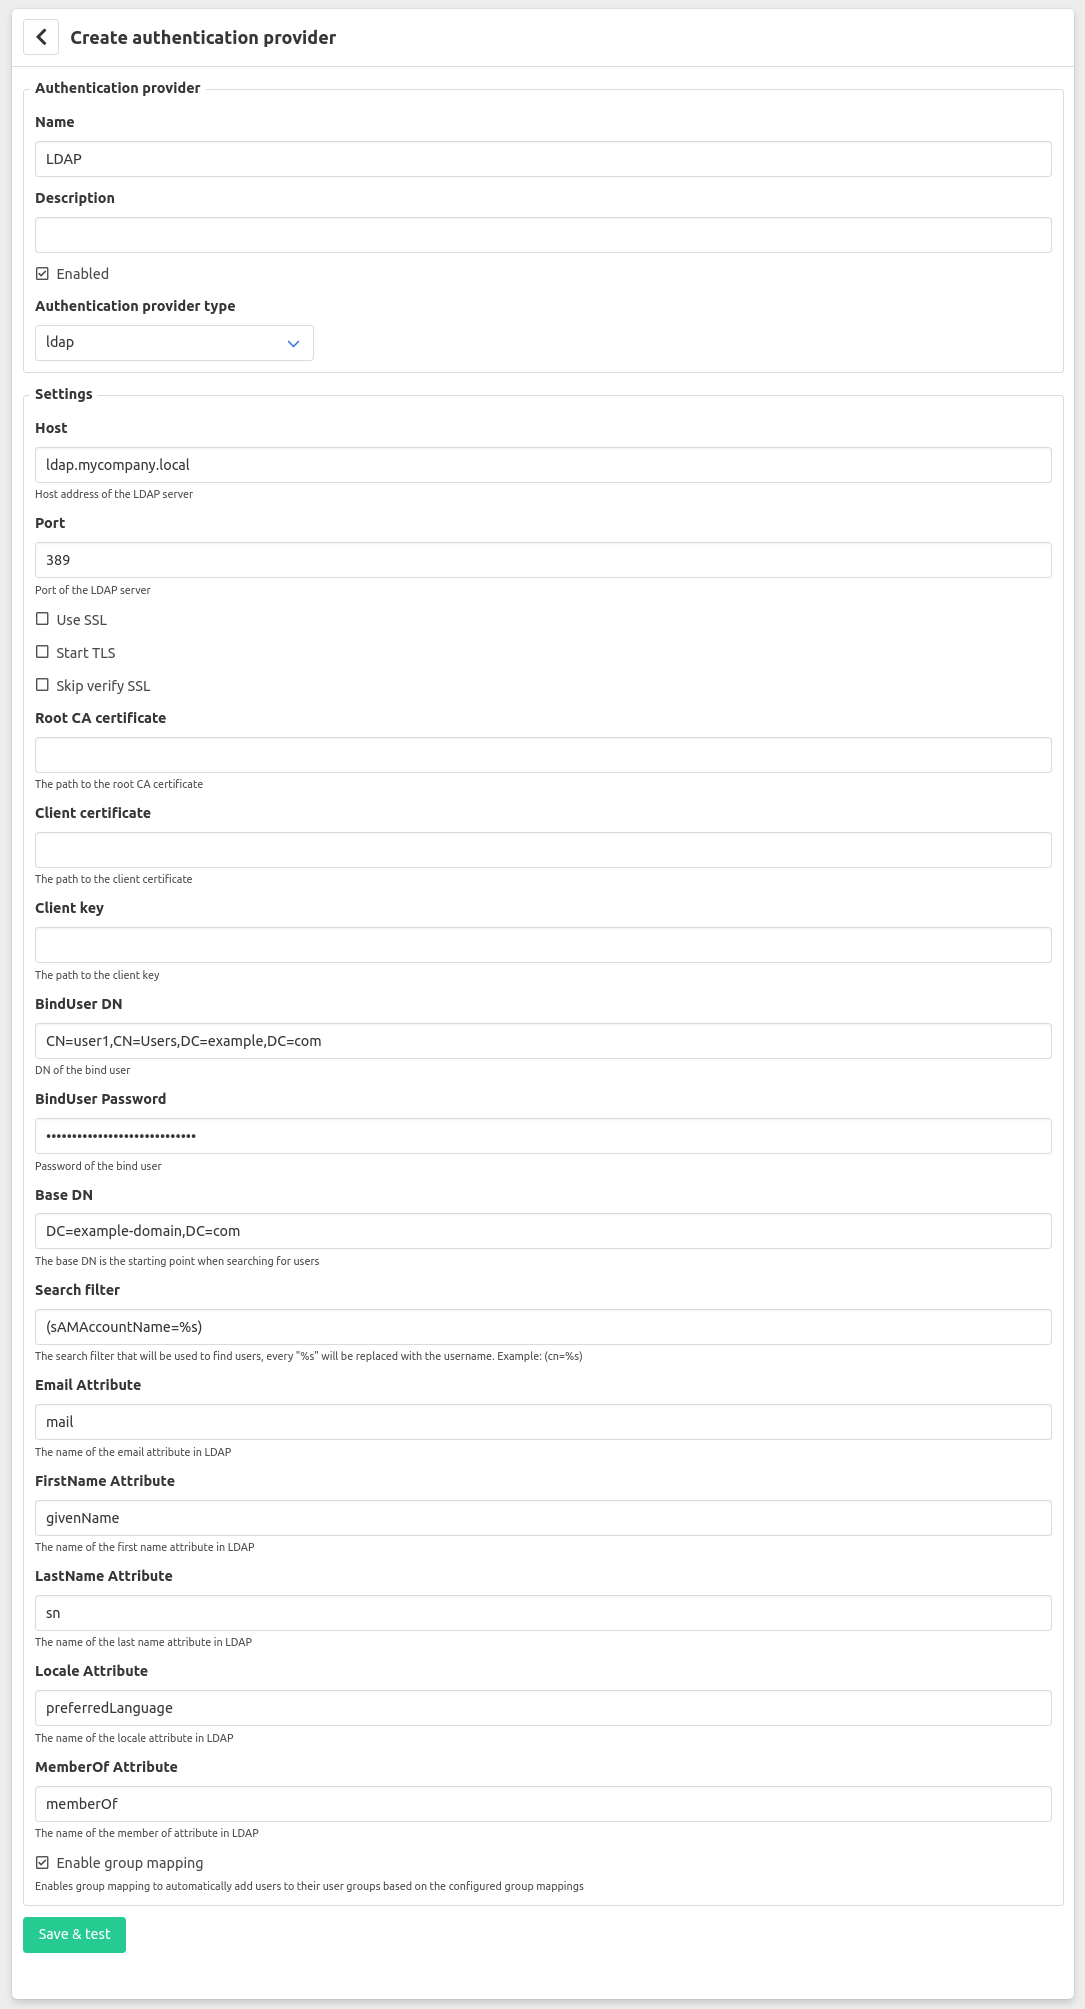
- Host: This is the ip address or FQDN of the LDAP server to connect to.
- Port: The port on which the LDAP service is listening
- Use SSL: Check to enable SSL
- Use TLS: Check to enable TLS
- Skip verify SSL: Check to skip the verification of the server certificate if SSL or TLS is enabled
- Root CA Certificate: If the LDAP server has SSL enabled and you are using self-signed certificates provide the full location to the trusted root CA certificate with which the server certificate has been signed. This certificate must be placed on the same server which is running Factry Historian and must be readable for the factry-system user.
- Client certificate: If client certification authentication is enabled provide the full path to the client certificate. This certificate must be placed on the same server which is running Factry Historian and must be readable for the factry-system user.
- Client key: If a client certificate is configured provide the full path to the key to decrypt the certificate. This file must be placed on the same server which is running Factry Historian and must be readable only to the factry-system user.
- BindUser DN: Provide the distinguished name for the user which is used to bind to the LDAP server. For security purposes this user is best configured having read only access to the LDAP server.
- BindUser Password: The password used to authenticate the bind user.
- BaseDN: This is the “base distinguished name”. It is the starting point for all LDAP searches. All users which are to be authenticated against the LDAP server must be found within the directory tree beneath the BaseDN.
- Search filter: The search filter is used to define the criteria for searching the directory for a specific set of users. For example if you wish to lookup users by their common name use
(cn=%s)(%s is replaced the username on login).
The following configuration parameters are used to extract extra attributes from the LDAP users to enrich the attributes of the user in Factry Historian.
- Email Attribute: The name of the email attribute in LDAP
- FirstName Attribute: The name of the first name attribute in LDAP
- LastName Attribute: The name of the last name attribute in LDAP
- Locale Attribute: The name of the local attribute in LDAP
- MemberOf Attribute: This attribute is used to determine the group membership of a user. It is only used if the
enable group mappingoption is enabled. - Enable group mapping: Check this if you wish to use the membership of groups in LDAP to infer the group membership of a user in Factry Historian.
User group mapping
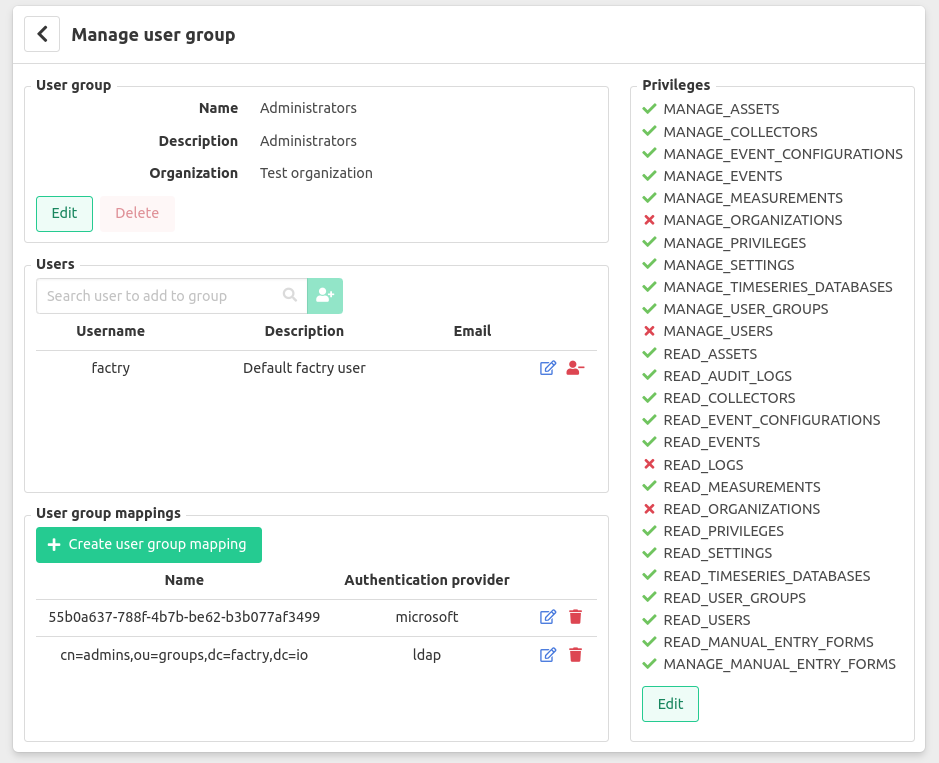
In order to authorize users according to their group membership in either LDAP or Microsoft you will have to indicate which corporate groups correspond to which Factry Historian groups. This can be achieved by editing the Historian user group you wish to map and add a group mapping. Below you can find a screenshot in which an Administrators user group has been mapped to a user group in LDAP and a security group in Microsoft Azure.
