How to install Factry Historian on Ubuntu 22.04
Introduction
In this guide, we will follow the complete installation of Factry Historian.
Prerequisites
Before you begin this guide you’ll need the following:
- An Ubuntu 22.04 server with preferably a non-root sudo user
- The system should follow the system requirements which can be found here
Step 1 - Installing Influx time series database
Let’s start by installing an Influx instance by downloading the .deb file.
You can find how to install the latest version of Influx 1.x here and scroll to the bottom:

Open Are you interested in InfluxDB 1.x Open Source and select Ubuntu & Debian for the Platform. The install command will show up and should look similar as in the example below.
Install Influx.
wget https://dl.influxdata.com/influxdb/releases/influxdb_1.8.10_amd64.deb
sudo dpkg -i influxdb_1.8.10_amd64.deb
Enable and start Influx.
sudo systemctl enable influxdb
sudo systemctl start influxdb
The InfluxDB service should now be enabled and propertly started. Verify that the service is running.
sudo systemctl status influxdb
Verify the InfluxDB shell is installed by opening it using the following command.
influx
Step 2 - Configuring Influx time series database
In this step we create an admin user for Influx that will be used when configuring Factry Historian.
But before we create the admin user we need to enable authentication and disable logging. Open up the InfluxDB configuration file.
sudo nano /etc/influxdb/influxdb.conf
Find the [http] section and set:
enabledtotrueauth-enabledtotrueflux-enabledtotruelog-enabledtofalse
[http]
  enabled = true
  auth-enabled = true
  flux-enabled = true
  log-enabled = false
Next, find the [data] section and set.
query-log-enabledtofalse
[data]
query-log-enabled = false
Restart Influx to apply the new configuration.
sudo systemctl restart influxdb
Create the admin user. Since there is no admin user yet, authentication won’t be enforced until we create one, and untill then no other queries are allowed. Open up the InfluxDB shell.
influx
Inside the Influx shell, create an admin user (replace <password> with your password of choice).
CREATE USER factry WITH PASSWORD '<password>' WITH ALL PRIVILEGES
Verify that the user was created.
SHOW USERS
The output should look like:
user   admin
----   -----
factry true
Step 3 - Installing Grafana
Next we will install Grafana.
Install Grafana .
sudo apt-get install -y adduser libfontconfig1
wget https://dl.grafana.com/oss/release/grafana_9.1.2_amd64.deb
sudo dpkg -i grafana_9.1.2_amd64.deb
Start Grafana.
sudo systemctl daemon-reload
sudo systemctl start grafana-server
Check if the service is running.
sudo systemctl status grafana-server
Configure the Grafana server to start automatically on reboots.
sudo systemctl enable grafana-server.service
Step 4 - Installing Postgres
In the last step before installing Factry Historian, Postgres needs to be installed. The historian server needs a running instance of Postgres, with its version at least v11.
Install Postgres.
sudo apt-get update
sudo apt install postgresql postgresql-contrib
Check if the service is running.
sudo systemctl status postgresql.service
Step 5 - Installing Factry Historian
Now that Influx, Grafana and Postgres are running on our system, Factry Historian can be installed.
First make sure you have the latest version of Factry Historian available on the Ubuntu server. Download the latest version of Factry Historian .
Install using the debian file.
sudo apt install ./factry-historian-server_vx.x.x_linux-x64.deb
The installation will ask if you wish to configure a local postgres database, answer yes. For the other prompts, press enter to keep the default values.
The output should look like the following.
Do you wish to configure a local postgres database?[yn]y
Provide a username to connect to the postgres with. Leave empty for default (factry) value.
Username [factry]:
Using factry as database user.
Provide a password to connect to the postgres with. Leave empty to generate one.
Password:
Confirm password:
Provide a databasename for the historian-server. Leave empty for default value.
Database name [factry_historian]:
Using factry_historian as database.
Provide a secret for historian - collector communication. Leave empty to generate one.
Secret:
Confirm secret:
Appending historian administration credentials to file: /tmp/factry-credentials
Make sure to save the historian credentials and remove the file afterwards
Factry historian administration finished!
### NOT starting on installation, please execute the following statements to configure factry historian to start automatically using systemd
 sudo /bin/systemctl enable factry-historian-server
### You can start factry historian by executing
 sudo /bin/systemctl start factry-historian-server
Save the historian credentials (located in /tmp/factry-credentials) in a secure place and remove the file.
Enable and start the historian server.
sudo /bin/systemctl enable factry-historian-server
sudo /bin/systemctl start factry-historian-server
Check if the service is running.
sudo systemctl status factry-historian-server.service
The output should look like the following.
● factry-historian-server.service - Factry Server for Historian
     Loaded: loaded (/lib/systemd/system/factry-historian-server.service; enabled; vendor preset: enabled)
     Active: active (running) since Tue 2022-08-30 12:24:11 UTC; 4s ago
   Main PID: 12050 (factry-historia)
      Tasks: 6 (limit: 2327)
     Memory: 19.3M
        CPU: 141ms
     CGroup: /system.slice/factry-historian-server.service
             └─12050 /opt/factry/factry-historian-server

Aug 30 12:24:12 historian-guide factry-historian-server[12050]: {"level":"warning","msg":"No environmental value set for PORT, using default value 8000","tim>
Aug 30 12:24:12 historian-guide factry-historian-server[12050]:    ____    __
Aug 30 12:24:12 historian-guide factry-historian-server[12050]:   / __/___/ /  ___
Aug 30 12:24:12 historian-guide factry-historian-server[12050]:  / _// __/ _ \/ _ \
Aug 30 12:24:12 historian-guide factry-historian-server[12050]: /___/\__/_//_/\___/ v4.7.2
Aug 30 12:24:12 historian-guide factry-historian-server[12050]: High performance, minimalist Go web framework
Aug 30 12:24:12 historian-guide factry-historian-server[12050]: https://echo.labstack.com
Aug 30 12:24:12 historian-guide factry-historian-server[12050]: ____________________________________O/_______
Aug 30 12:24:12 historian-guide factry-historian-server[12050]:                                     O\
Aug 30 12:24:12 historian-guide factry-historian-server[12050]: ⇨ http server started on [::]:8000
More info about how to configure the historian server service can be found here , but for this tutorial the default values should suffice.
Step 6 - Factry Historian Setup Wizard
Now that everything is installed and running, you are able to login into Factry Historian and complete the setup.
Navigate to <IP of server>:8000, you should see the login screen of Factry Historian. For Name enter factry and for password, the
default password
.
https:// with http:// at the start of the browser url. If this is not working out, open the url in an incognito browser window.

Next you are prompted to update your password. Enter a new password and press change password.

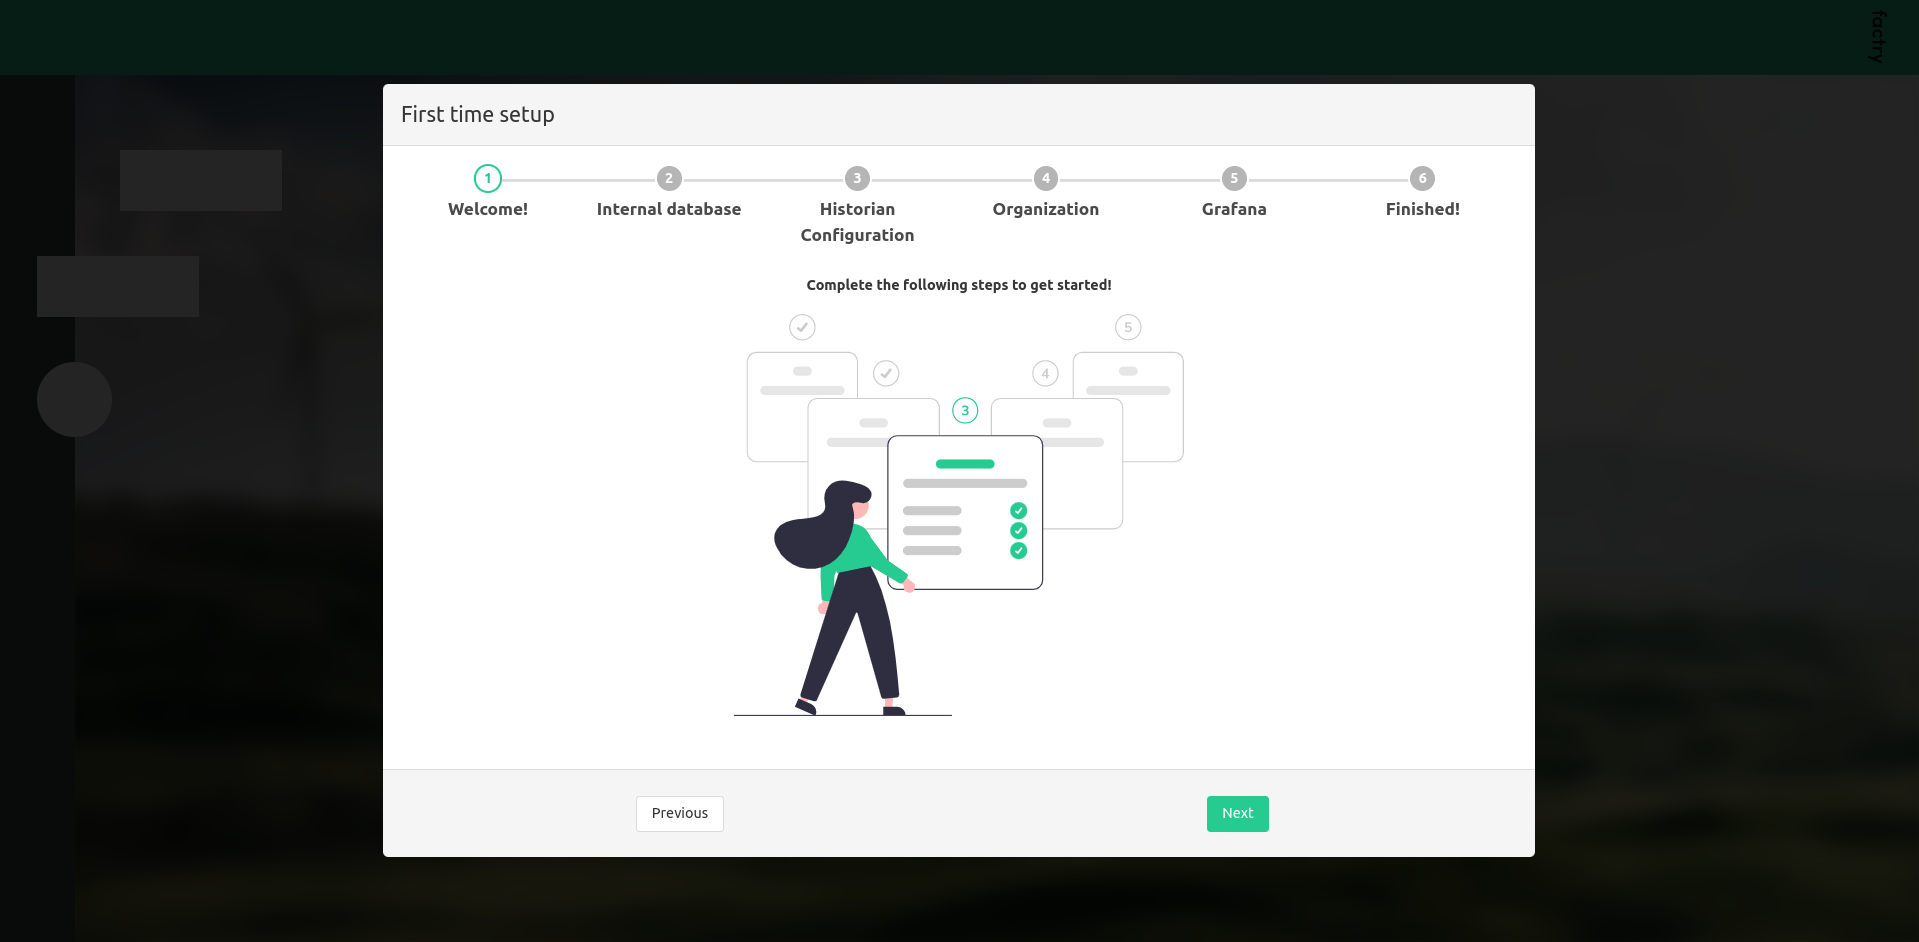
The First time opening the historian webpage will open the setup wizard. Here you can configure the internal Influx database, the historian API settings and the Grafana settings.
Press Next.
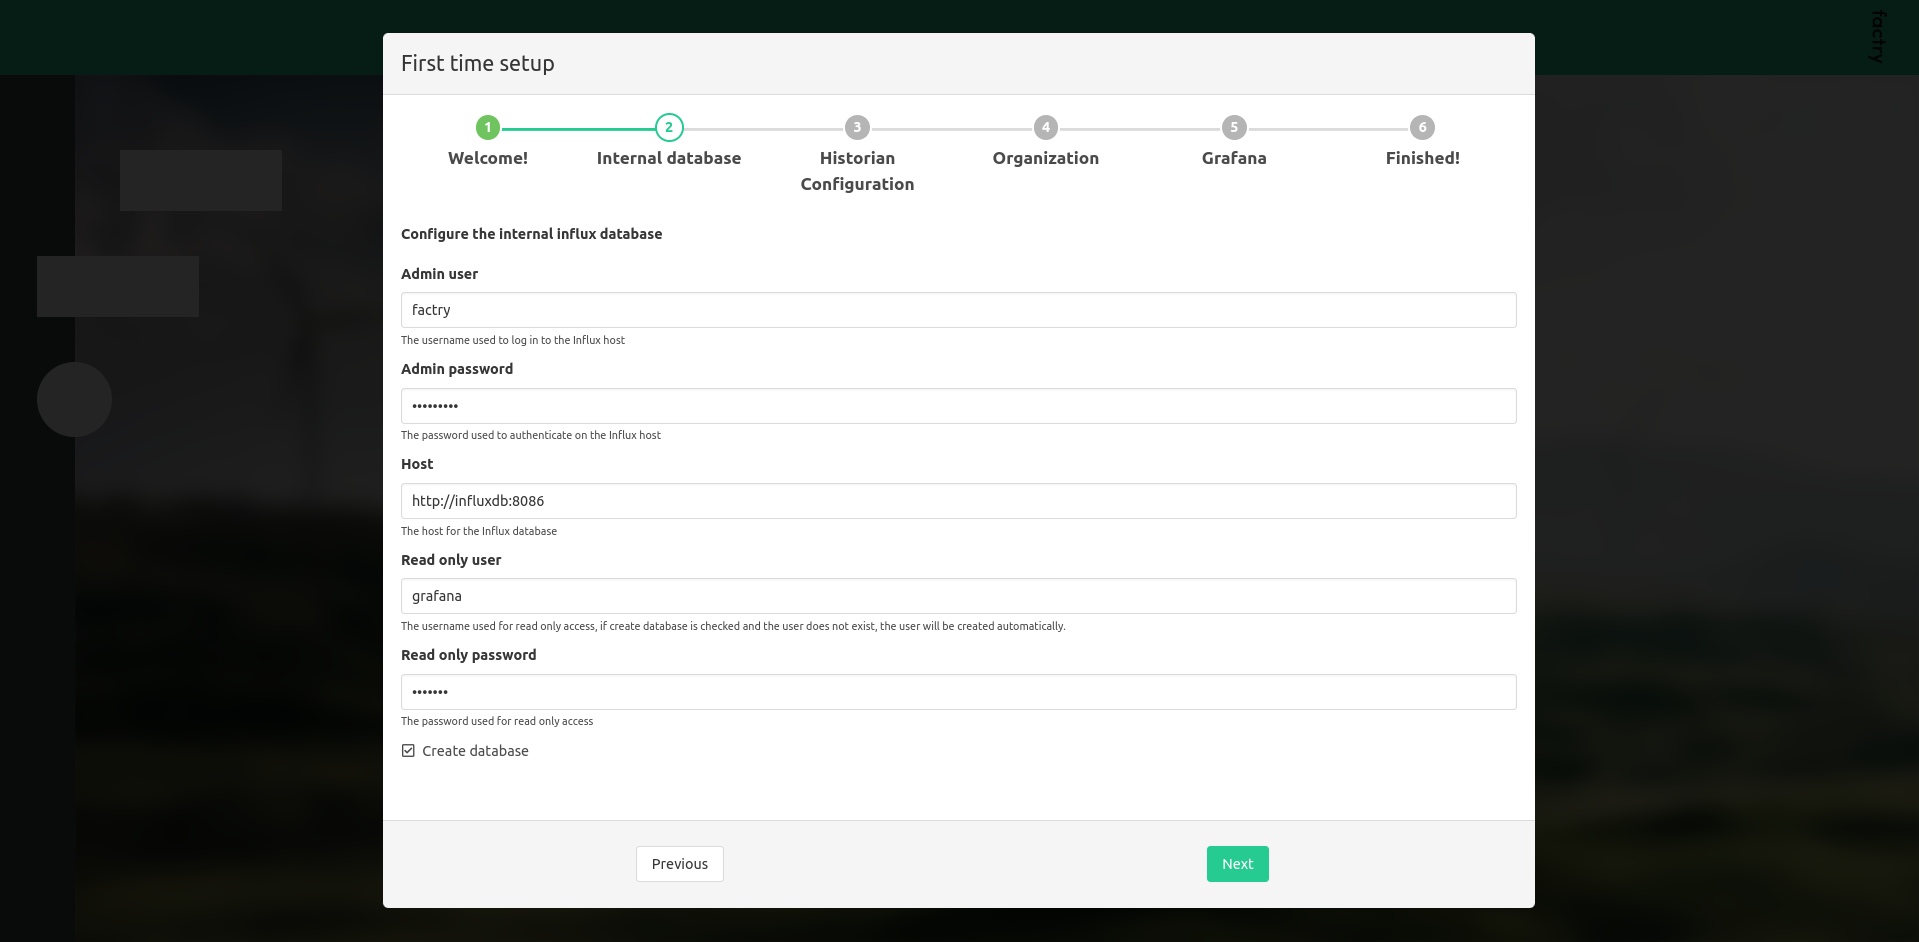
First we will configure the Internal time series database for Factry Historian.
Enter the credentials of the Influx admin user from
Step 2
. The Host can stay default unless you have Influx running on a separate server. Create database needs to stay checked unless the _internal_factry database already exists.
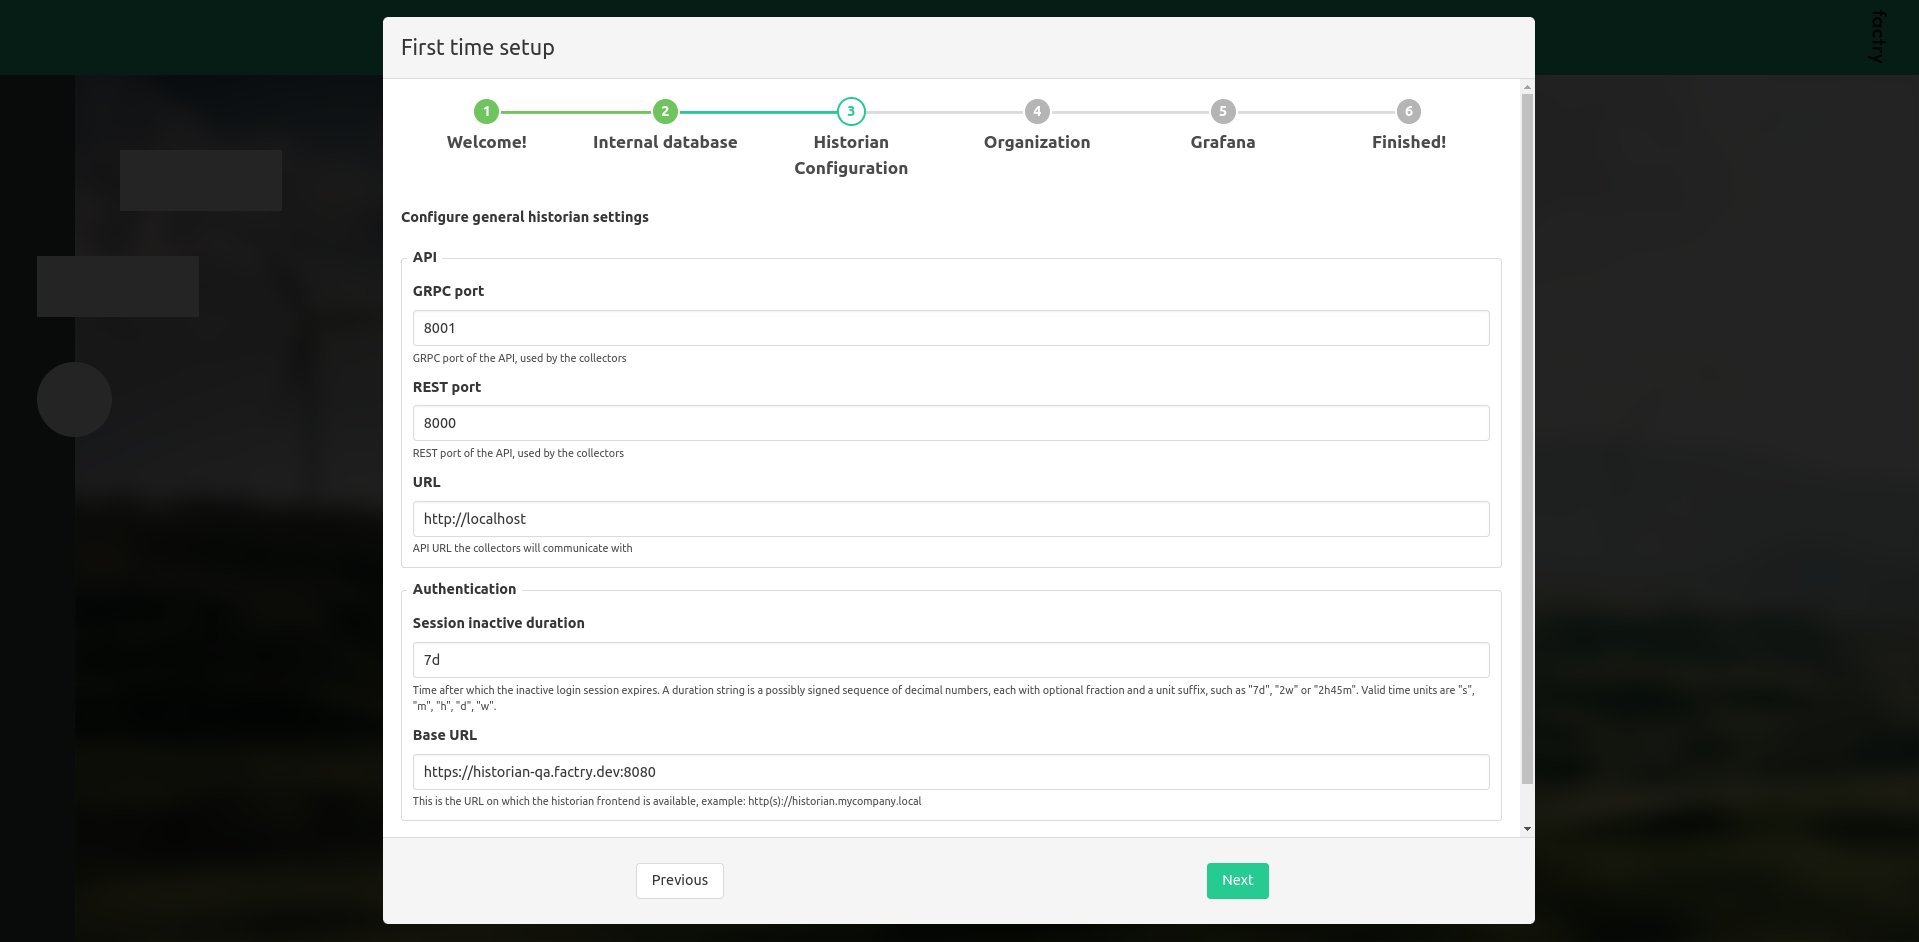
Next, configure the historian API settings which are used by the collectors to communicate with the historian server. Leave the default values for the GRPC port and the REST port. The Host should be updated to http://<IP of server>. For the Authentication Base URL enter the URL on which the frontend is available.
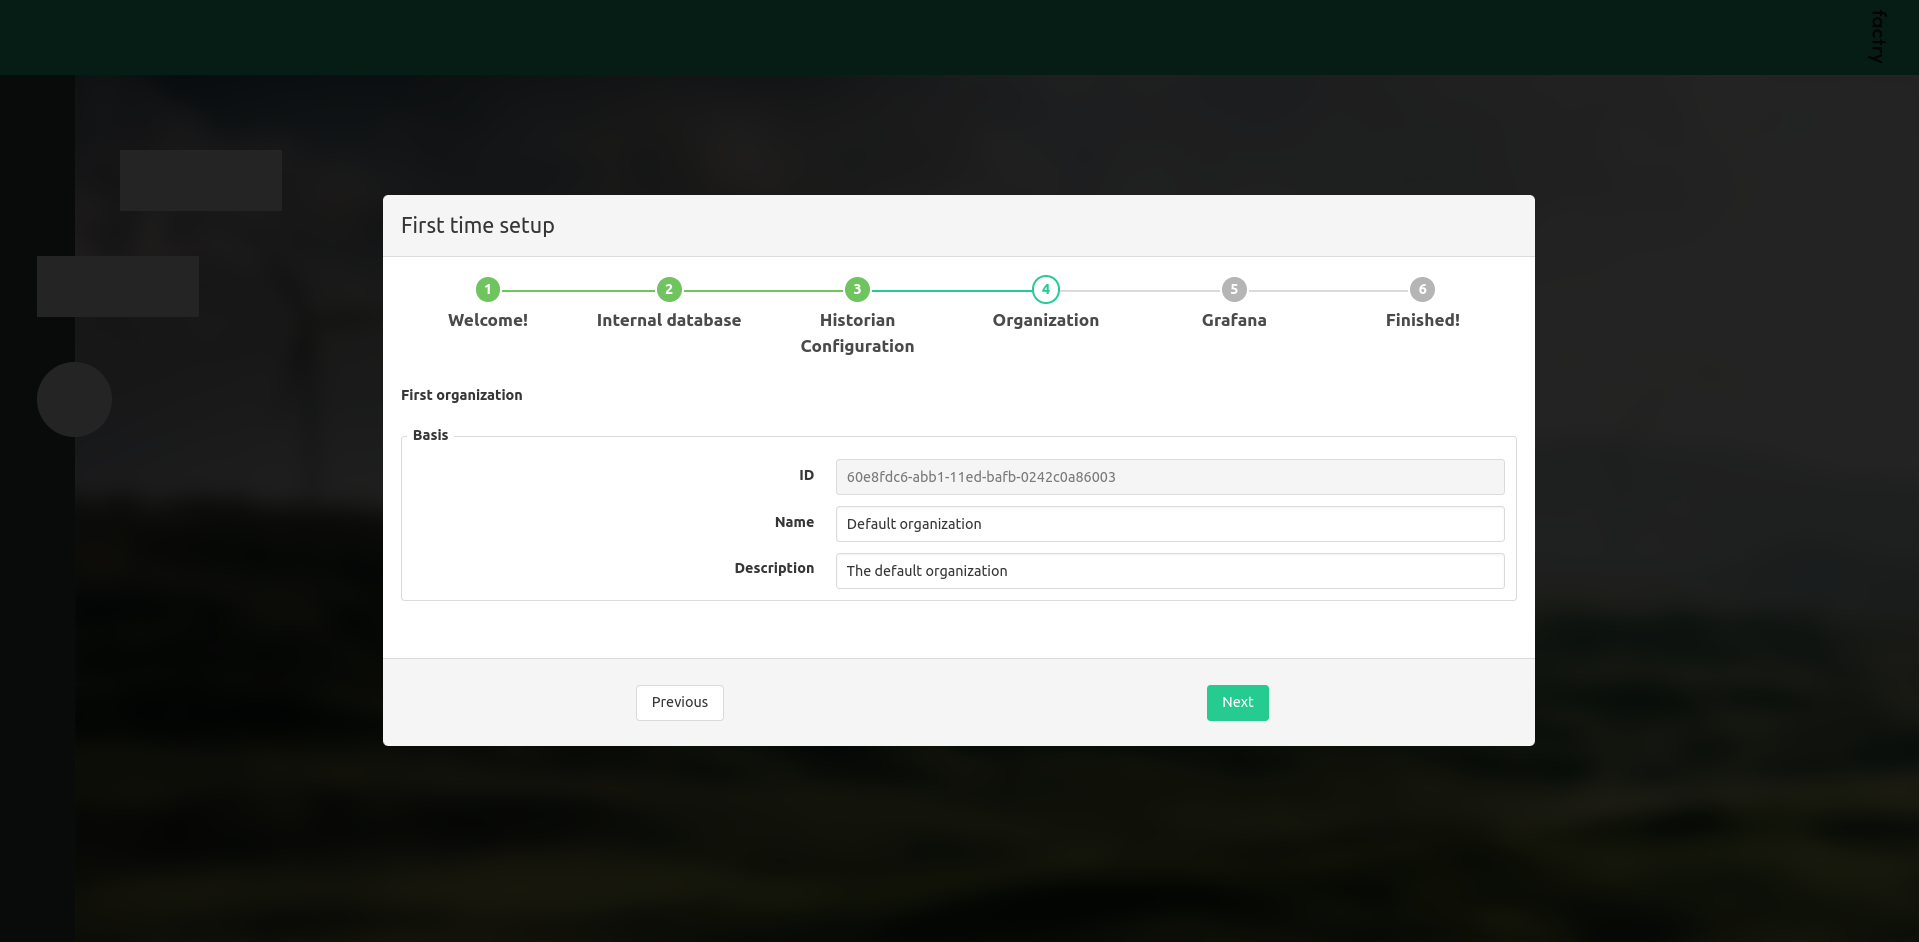
Enter a name en optionally a description for the organization.
Finally, configure the Grafana settings. This is used by Factry Historian to onboard time series datasources in Grafana. Unless you installed Grafana on another server, you can leave the value for the URL to the default setting.
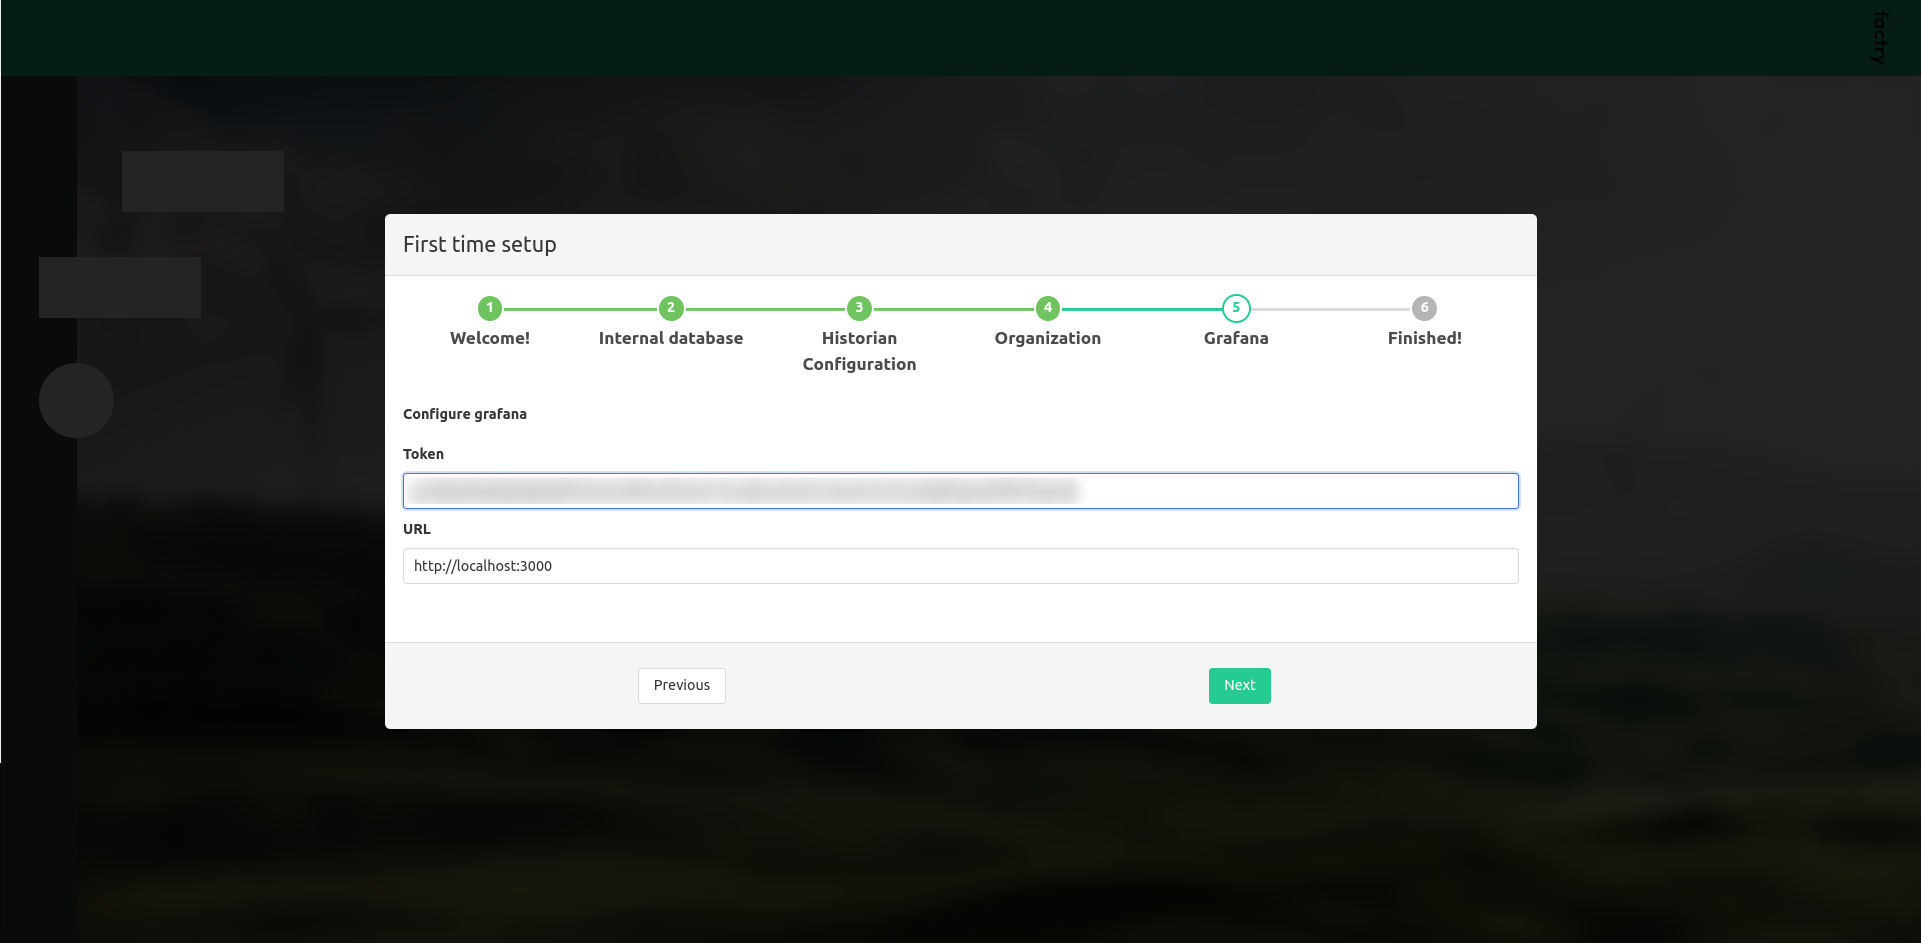
To get the Grafana Token, you need to navigate to the Grafana URL and
sign in to Grafana
.
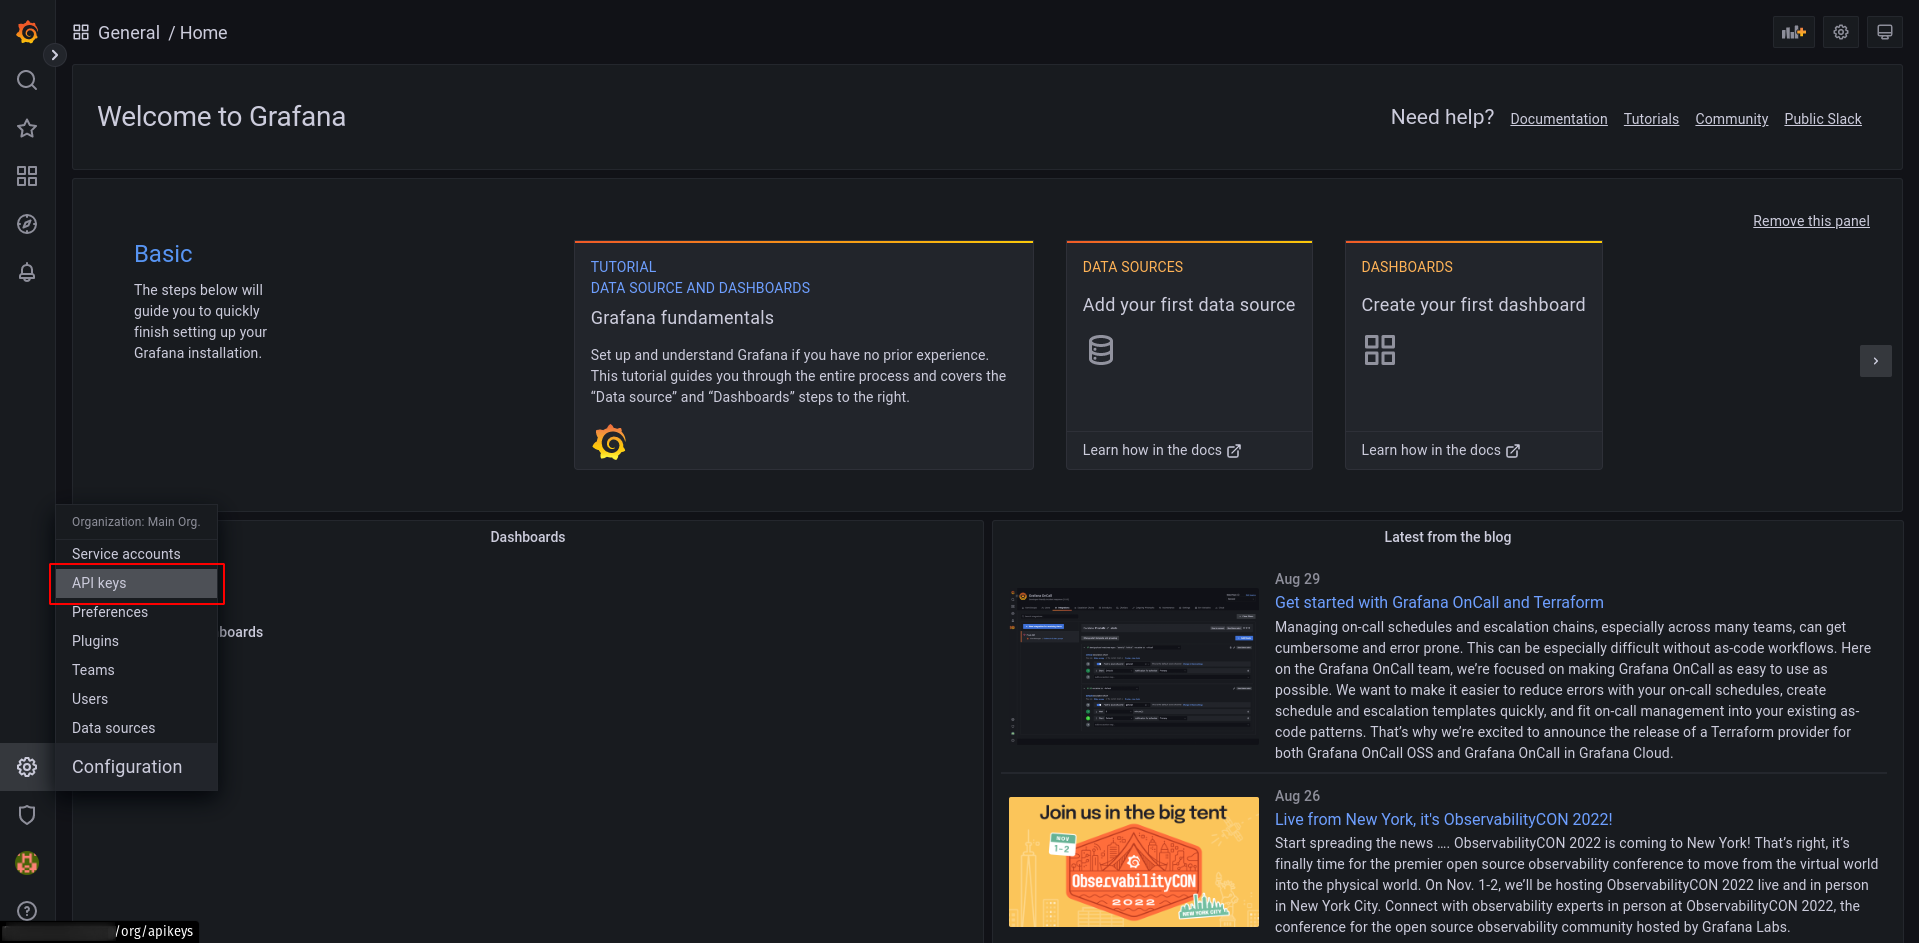
Once logged in, hover your cursor over Configuration (the gear icon), and click API Keys.
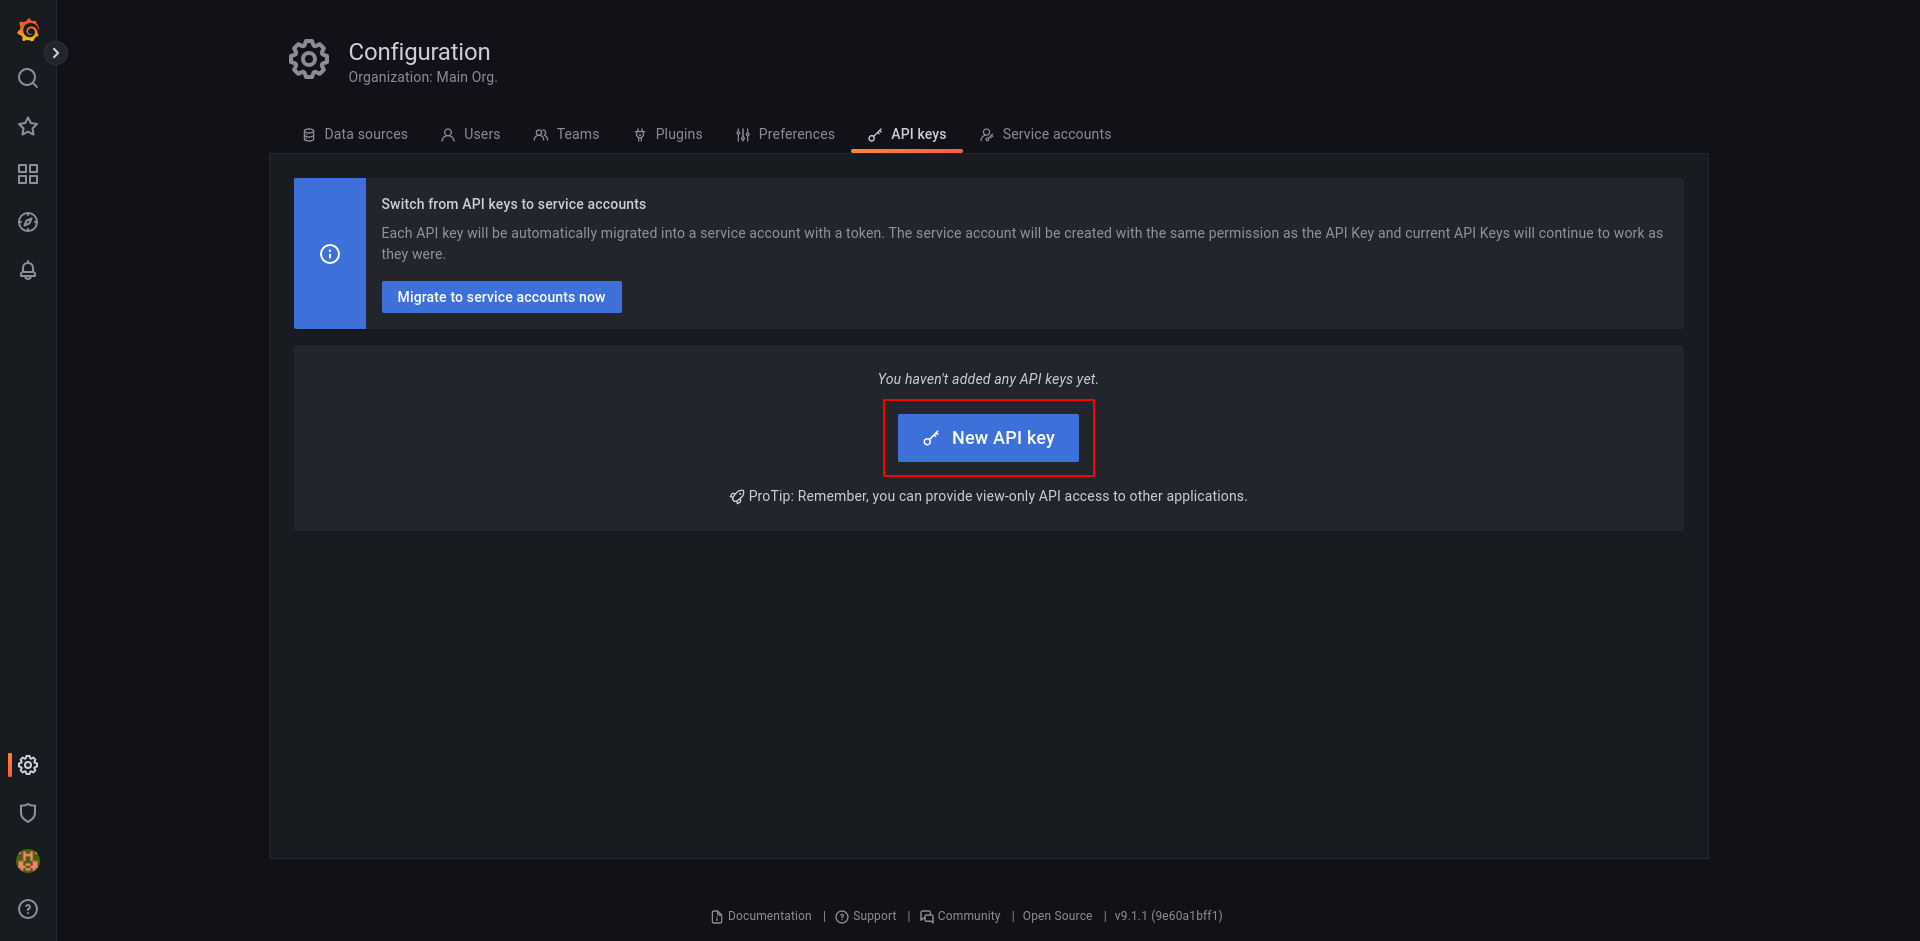
Click New API key to make a new token.
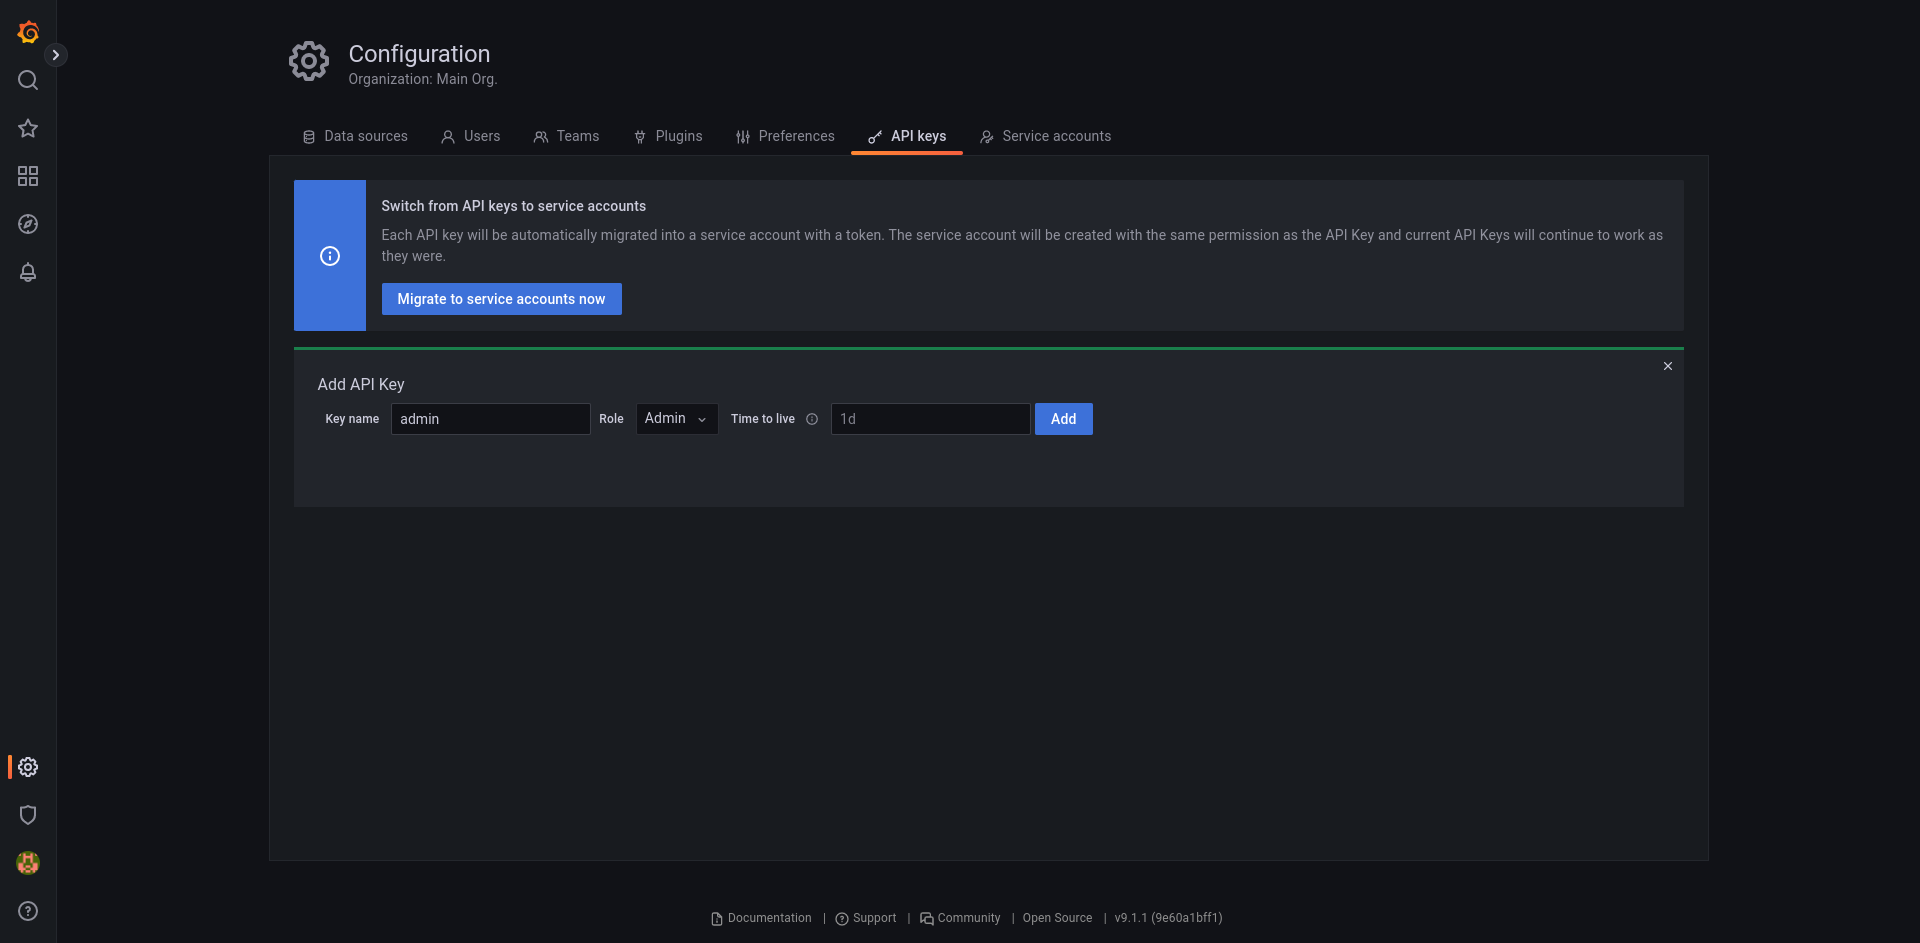
Enter a key name f.e. factry-historian and set the role to admin and click Add.
Copy the token.
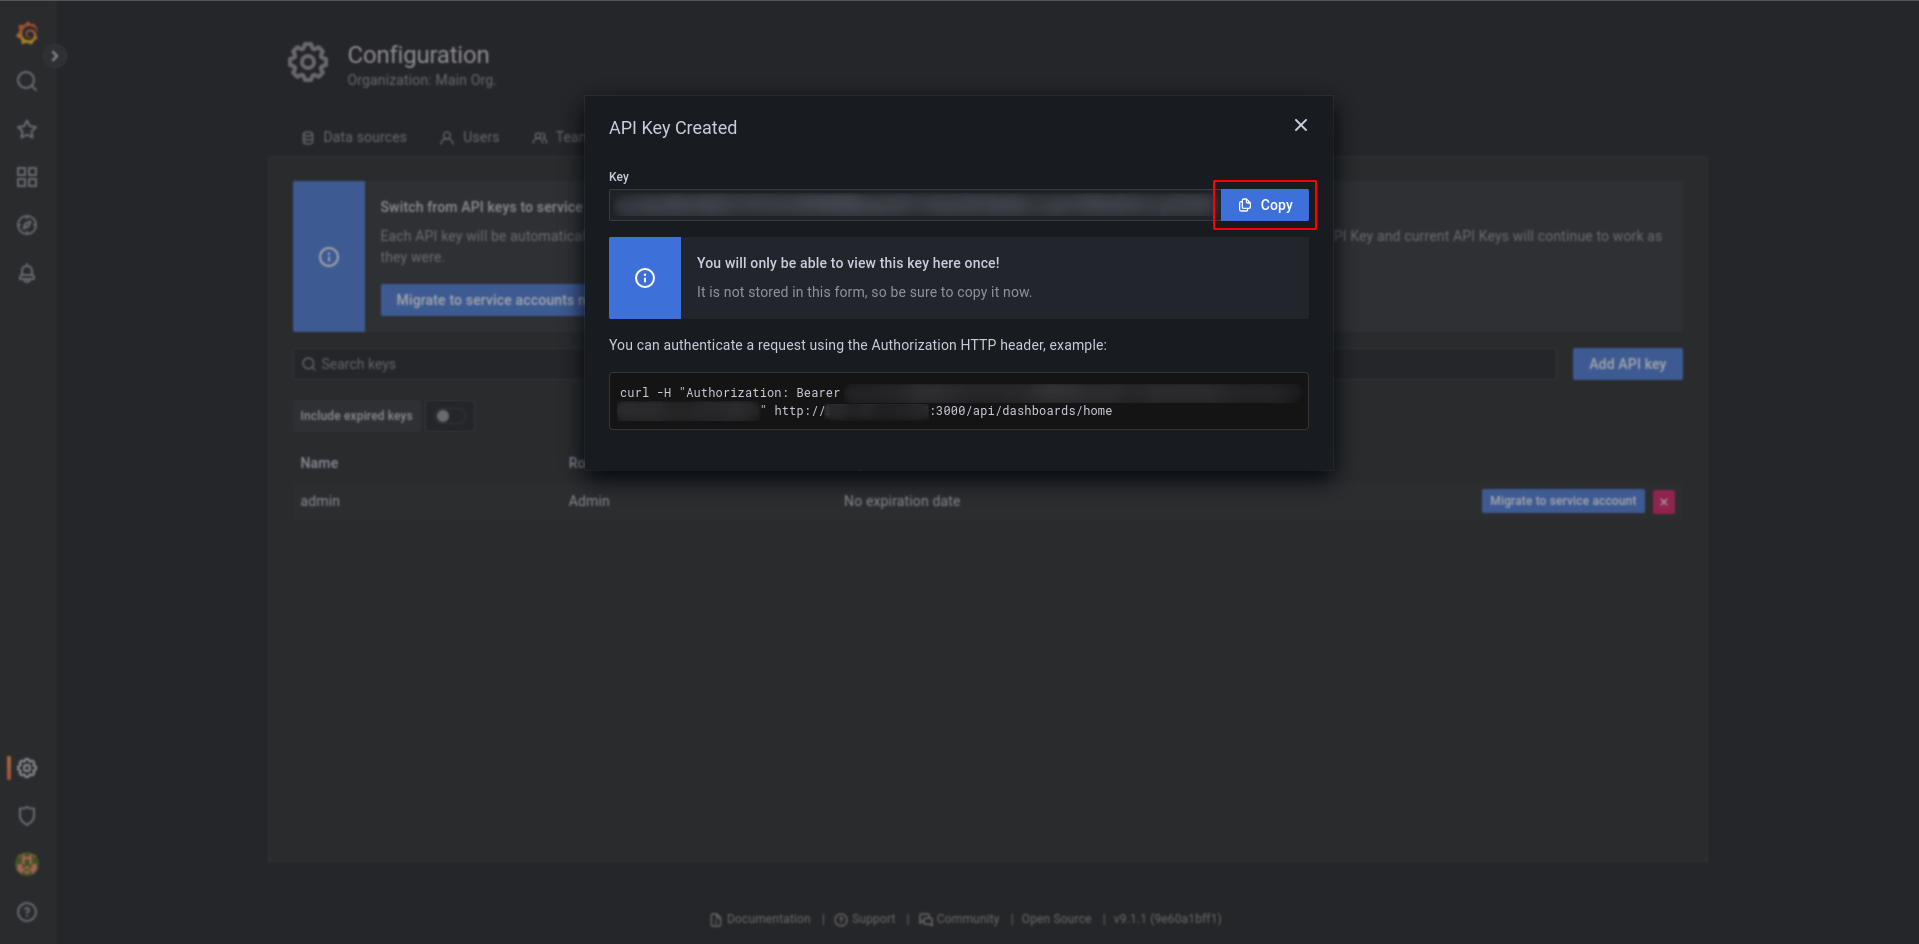
Paste the token in the Token field of the historian setup wizard and press Next.
We’re done! Click Finish to successfully complete the setup wizard!
Next steps
We have now successfully setup our Factry Historian installation! A next step would be to configure a time series database and start collecting some data .