Introduction
Manual entry forms are used for data entry by Factry Historian users. There currently are 2 types of forms.
Event form
This manual entry form allows you to manually enter
event property
values.
The configuration of the form will determine which event types are shown to the user. For each event type, you can configure which properties of those events are shown and which can be manually edited.
Asset properties form
This manual entry form allows you to to manually enter time series data on
asset properties
.
The configuration of the form determines which asset properties are available to the user and how they are grouped.
Configuring a manual entry form
Create a new manual entry form by going to the manual entry overview in the left menu bar and pressing the Create manual entry form button in the top right corner.
Basic configuration
Enter the basic information
- Enter a name
- Optionally enter a description
- Select a type
Enter the general configuration options
- Default time range (duration literal): the time range the manual entry form will show events for by default (default 24h)
- Maximum time range (duration literal):the maximum time range the manual entry form will allow you to view (default 7d)
- Auto refresh interval (duration literal): how often the manual entry form will automatically refresh (default 30s)
- Maximum edit age: the maximum age of an event, determined by its start time, that can be edited (default 24h)
- Maximum elevated edit age (duration literal): the maximum age of an event, determined by its start time, that can be edited by users with elevated privileges (default 24h)
- Datetime format: the format in which the start/stop time of the events in the manual entry form will be shown
To enter a duration literal: use numeric values followed by letters representing units of time: w for week, d for day, h for hour, m for minute, and s for second.
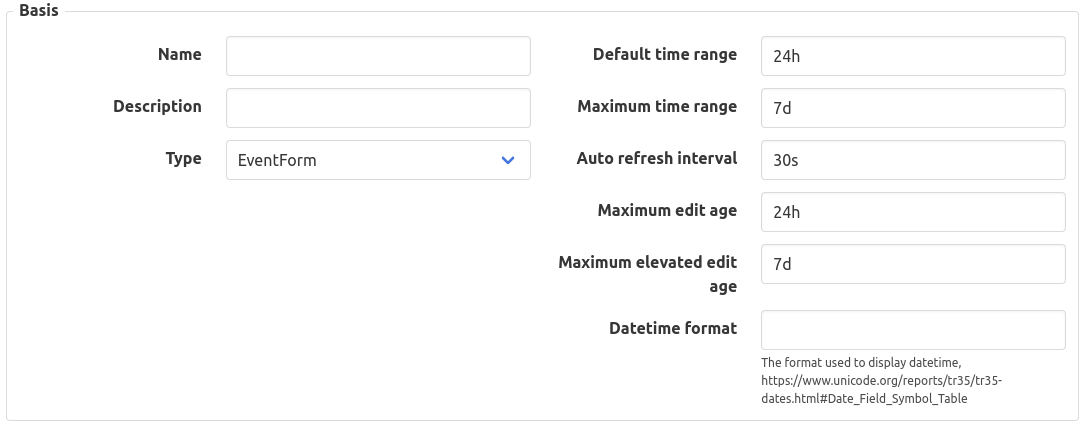
Depending on the selected type the configuration options will appear:
Don’t forget to configure the access rights !
Event form
Event configurations
The event configurations determine which events will be shown in the manual entry form.
To add an event configuration, press the Add event configuration button. This will open the following form.
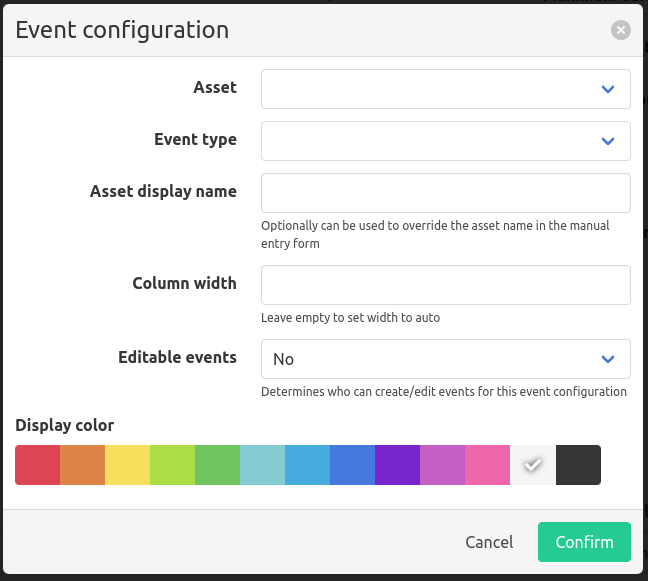
- Select an asset from the preconfigured asset tree
- Select an event type from the configured event types
- Optionally enter an asset display name to override the asset name
- Optionally enter a column width
- Select whether the event is editable or not, editable events can be created, edited and deleted
- Select a display color. This is useful for clearly separating different event types in the manual entry forms.
- Click
Confirm.

Groups
Properties are grouped together to make the manual entry form more structured.

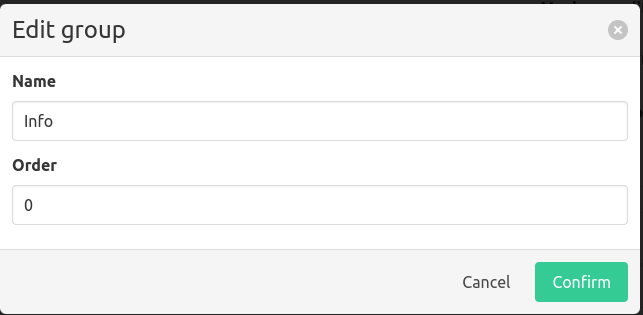
To add a group, press the Add group button. This will open a form.
Enter a name for the group and choose the order of the group. The order determines the ordering of the groups in the manual entry form. Groups are sorted incrementally.
Properties
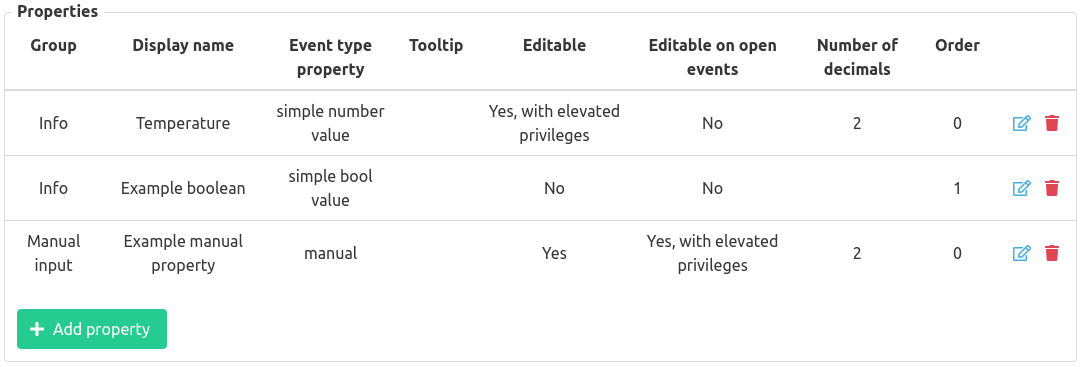
The configured event type properties determine which properties will be shown and which ones will be editable in the manual entry form.
To add a property, press the Add property button, this will open a form.
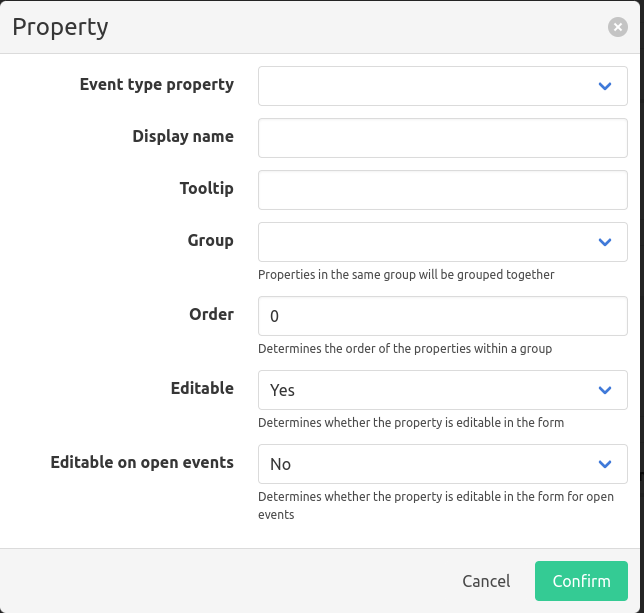
- Select an event type property
- Enter a display name for the property
- Optionally enter a tooltip. This will be shown to the end user when hovering over the event property.
- Enter a group. Properties in the same group will be grouped together
- Optionally set the order of the property. This determines the order of the properties within the same group. Properties are sorted incrementally.
- Select whether the property is editable
- Select whether the property is editable on open events (events that have yet finished)
Asset properties form
Groups
Configuring groups is only necessary if the form is not using the asset tree display.
Properties are grouped together to make the manual entry form more structured.

To add a group, press the Add group button. This will open a form.
Enter a name for the group and choose the order of the group. The order determines the ordering of the groups in the manual entry form. Groups are sorted incrementally.

Asset properties
The asset properties determine which assets and asset properties will be available for manual entry.

There are 2 ways to group the asset properties in the form, by using the existing structure of the asset tree or by assigning a group to each asset property.
Press Configure asset properties.
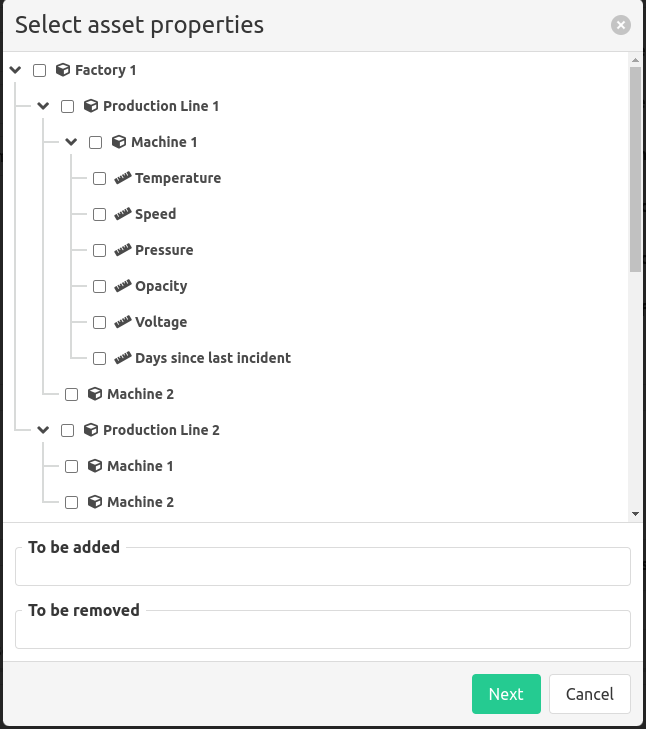
Select the asset properties you want to add to the manual entry form and press Next
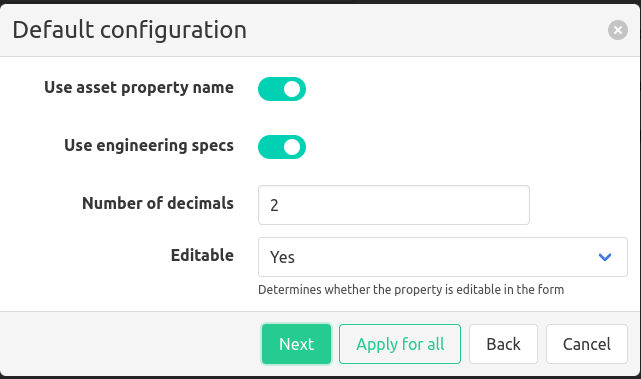
Using tree display
- Select whether to prefill the asset property name as the display name
- Select whether to use the engineering specifications
- Enter the default number of decimals to display for numeric properties
- Enter whether the property is editable
Click Apply for all if the default configuration can be used for all the asset properties, press next to edit them individually.
- Enter a display name
- Optionally enter a tooltip
- Select whether to use engineering specs configured on the measurement linked to the asset property
- Optionally set the order of the property. This determines the order of the properties within the same group. Properties are sorted incrementally.
- Enter the number of decimals to display for numeric properties
- Enter whether the property is editable
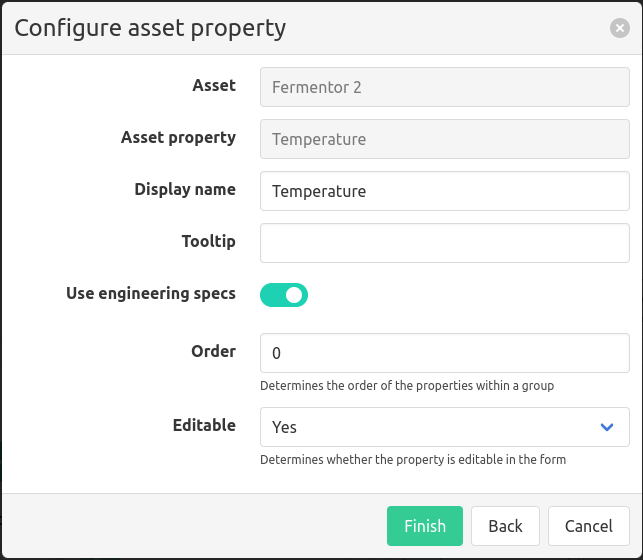
Do this for all the selected asset properties and click Finish.

Using grouping
- Select whether to prefill the asset property name as the display name
- Select whether to use the engineering specifications
- Enter the default number of decimals to display for numeric properties
- Enter the default group to add the asset properties to
- Enter whether the property is editable
Click Apply for all if the default configuration can be used for all the asset properties, press Next to edit them individually. A default group is necessary to use Apply for all.
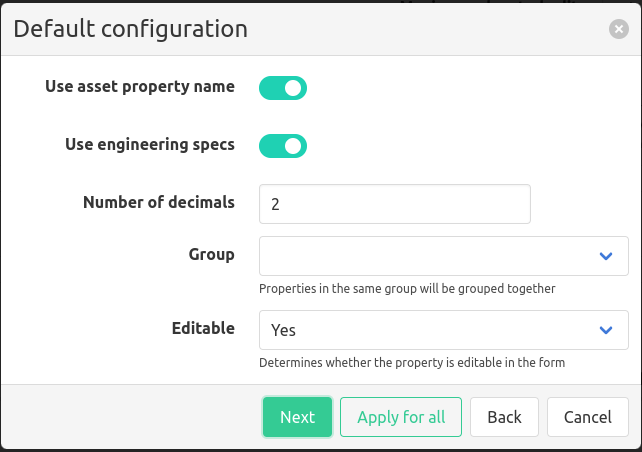
- Enter the group to add the asset property to
- Enter a display name
- Optionally enter a tooltip
- Select whether to use engineering specs configured on the measurement linked to the asset property
- Optionally set the order of the property. This determines the order of the properties within the same group. Properties are sorted incrementally.
- Enter the number of decimals to display for numeric properties
- Enter whether the property is editable
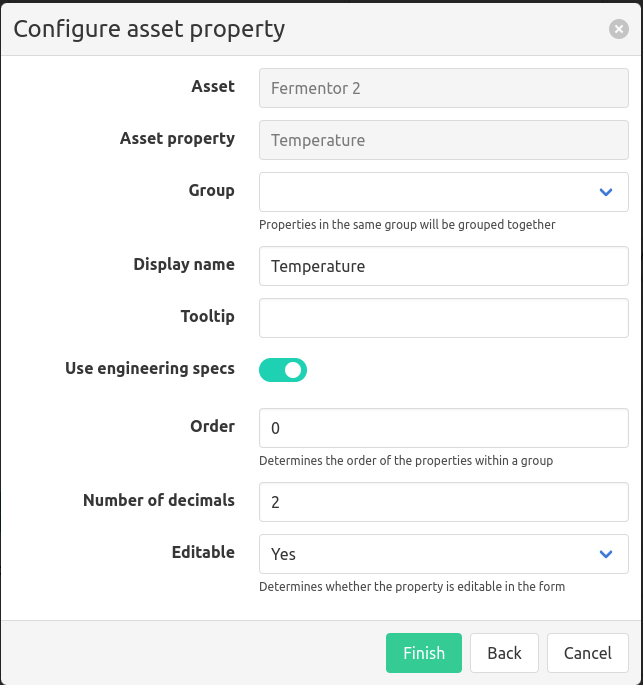
Do this for all the selected asset properties and click Finish.

Access rights
Only groups that are configured to have access rights will be able to view the manual entry form.
Select the
user groups
that need access rights by typing their name in the input field.
Select the user groups that have elevated access rights. If a user group has elevated access rights you don not need to add them to the groups with access rights.

Click Save.