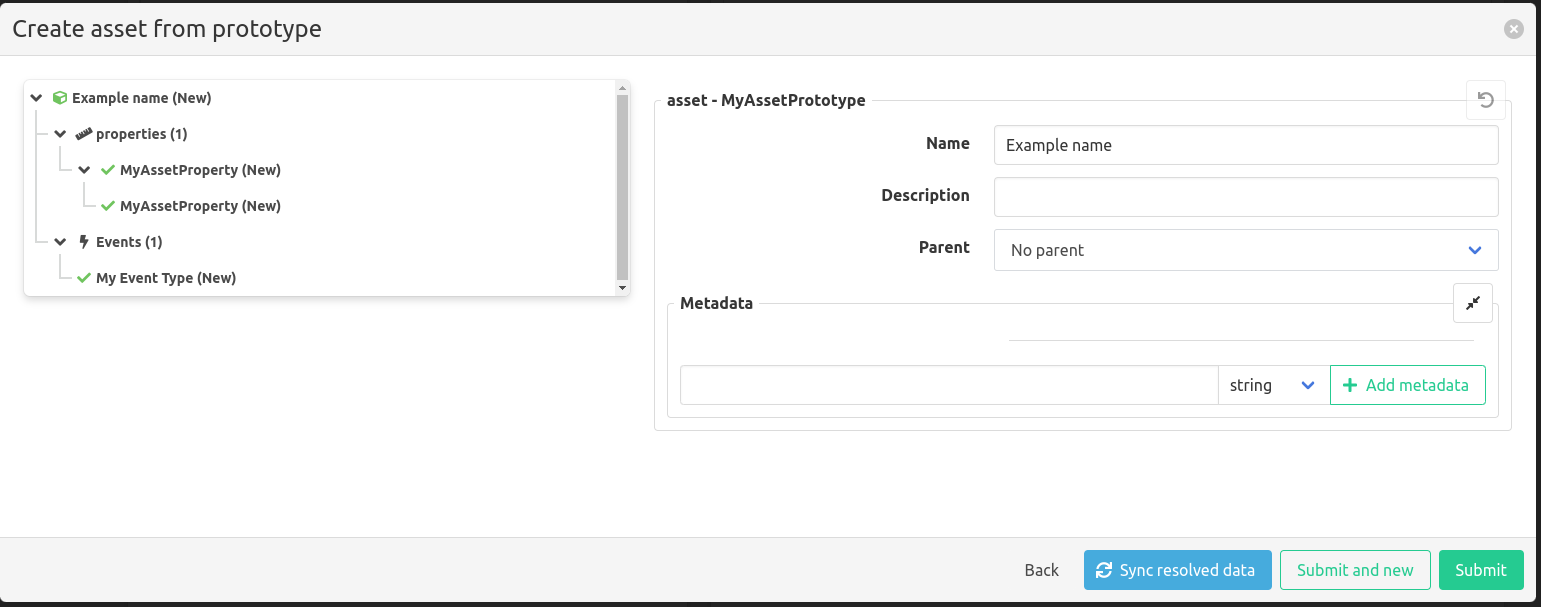
To instantiate an asset from a prototype, navigate to the Assets overview page and click the arrow next to the ‘+ Create Asset’ button, then on ‘Create asset from prototype’.
In the window that appears, select the prototype from the list from which you want to create an asset.
Configuring the asset instance

When configuring an asset instance, an overview is shown of the objects that will be created.
Elements with a green icon have all their required properties filled in by the prototype, elements with a red icon still require some manual configuration. All fields configured by the prototype can be manually overridden.
Asset properties can use the asset’s name and metadata to link to existing measurements or create new calculations. So after entering this information, the measurement or calculation can be linked or created, press the button Sync resolved data this will try to find the measurements or create the calculation name for the asset properties.
When all required fields are filled in, the ‘Submit’ or ‘Submit and new’ button can be clicked. Both buttons create the asset, but the ‘Submit and new’ button will keep the window open to create another asset from the same prototype.