Configuring Authentication in Grafana
Step 1: Add App Registration
Register a new application for Grafana as documented in Azure AD tutorial .
Step 2: Configure Azure AD Authentication Using the Grafana UI
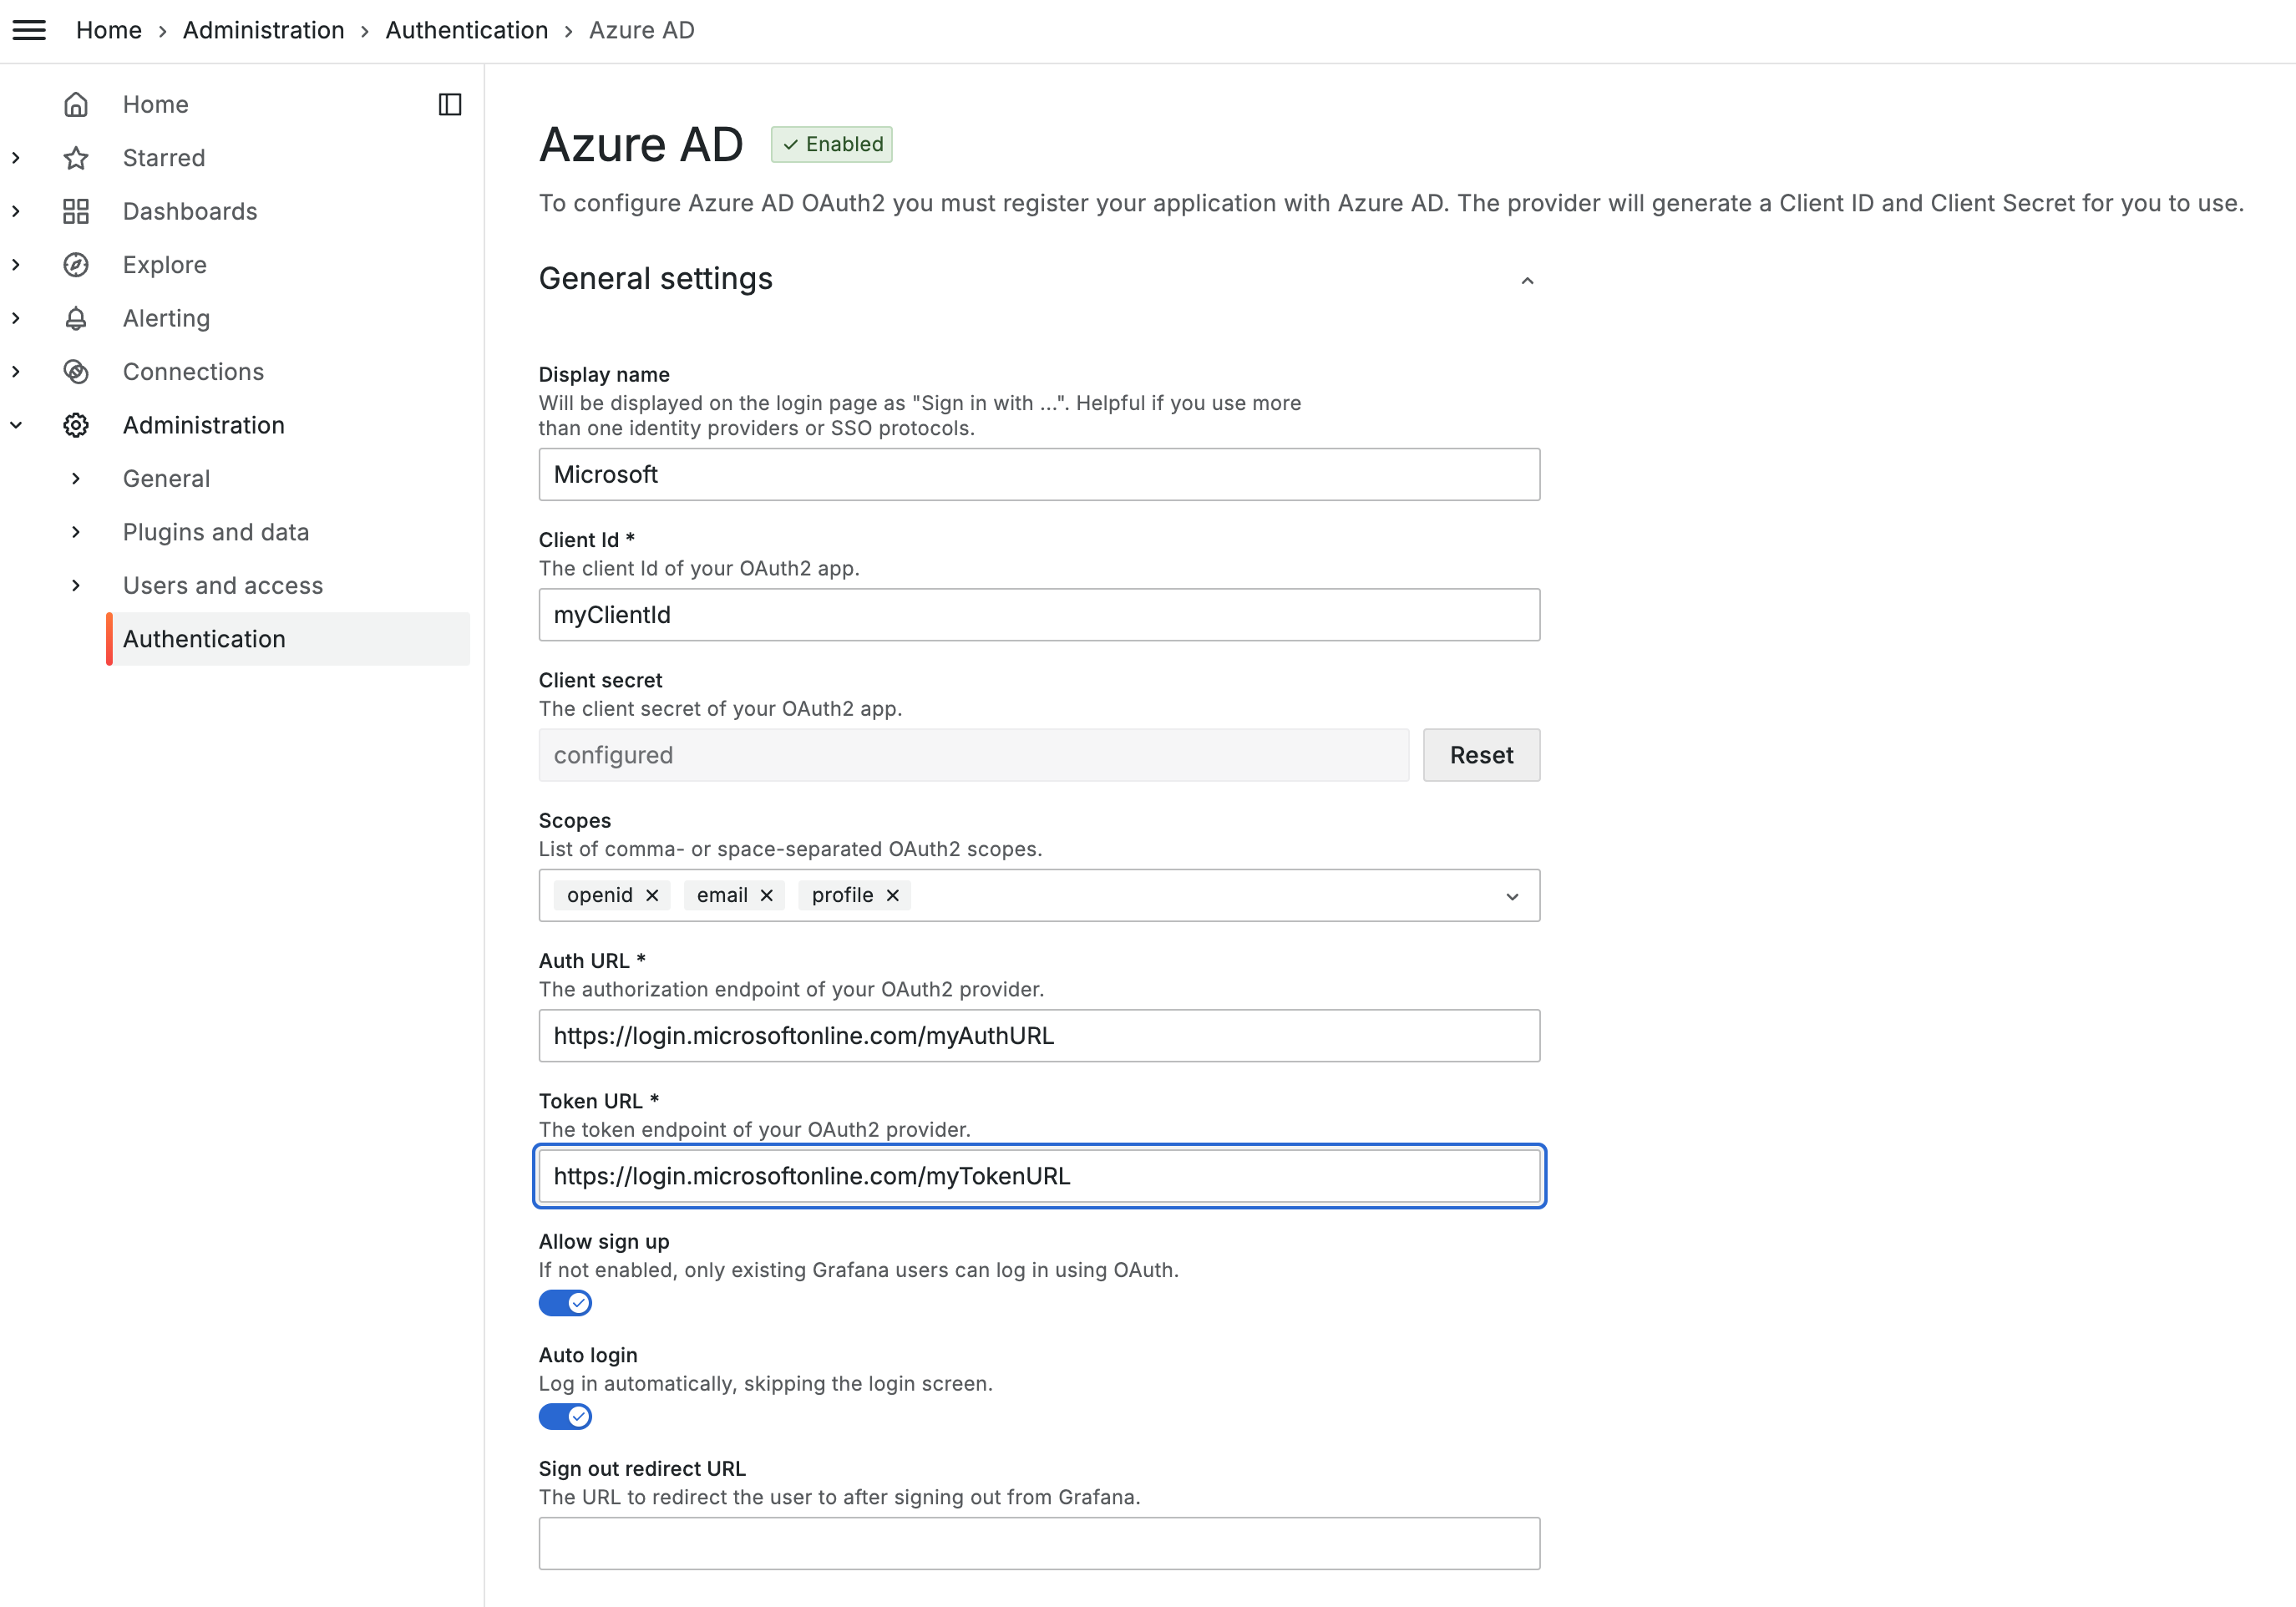
Grafana admins can configure Azure AD from within Grafana using the Grafana UI.
Navigate to the Administration > Authentication > Azure AD page and fill in the Client Id and Client secret from the steps performed in Step 1: Add App Registration.

Step 3: Define App Roles
To assign Grafana roles based on Azure AD group memberships we need to first define App Roles in Azure AD:
- In your Azure AD application, navigate to “App roles” and define roles corresponding to Grafana roles (e.g., Admin, Editor, Viewer).
- Assign the defined app roles to users or groups in Azure AD.
Step 4: Map Roles
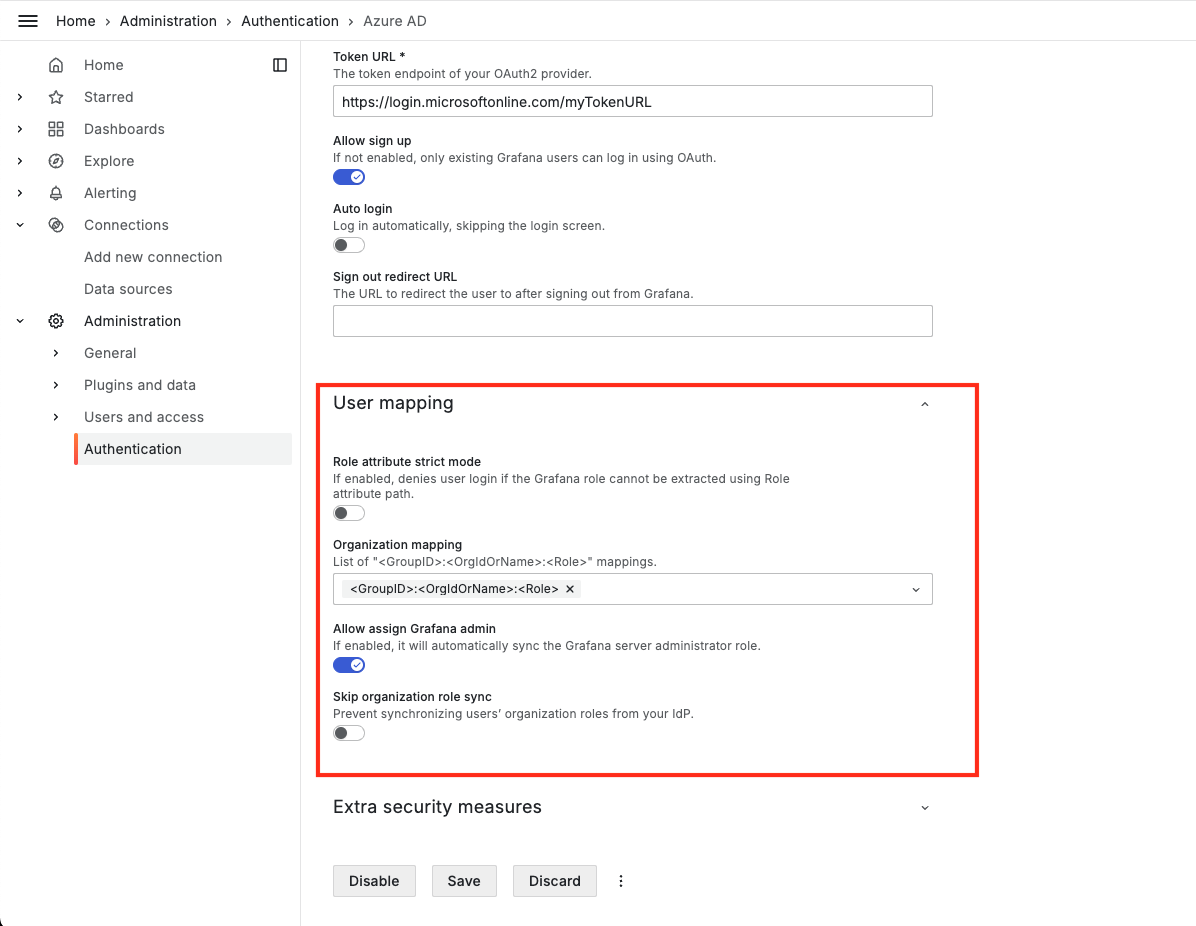
Configure user mapping in Grafana. Using <GroupID>:<OrgldOrName>:<Role>.
An example:
488f1647-d621-491e-9ec7-7994b4f022f5:1:Viewer
5343xde2-d621-491e-9ec7-7994b4f022f5:1:Editor
1dwefx23-d621-491e-9ec7-7994b4f022f5:1:Admin
Note: Please use different group ids for different organization/role mappings to avoid any conflicts in the user mapping.

Important: If a local Grafana user has the same email or username as the Azure AD user attempting to log in, Grafana will encounter a conflict when trying to create the user during OAuth authentication.
Solution: Identify and remove/change any local users in Grafana that have the same email or username as the Azure AD users.