Setting Up Azure AD for Authentication
Introduction
In this guide, we will show how to set up app registration in Microsoft Azure.
Step 1: Access Azure Portal
Go to https://portal.azure.com and click on Azure Active Directory

Step 2: Add App Registration
Click Add -> App registration

Step 3: Configure App Registration
Depending on the application you’re setting up, follow the appropriate instructions for Factry Historian or Grafana.
Factry Historian
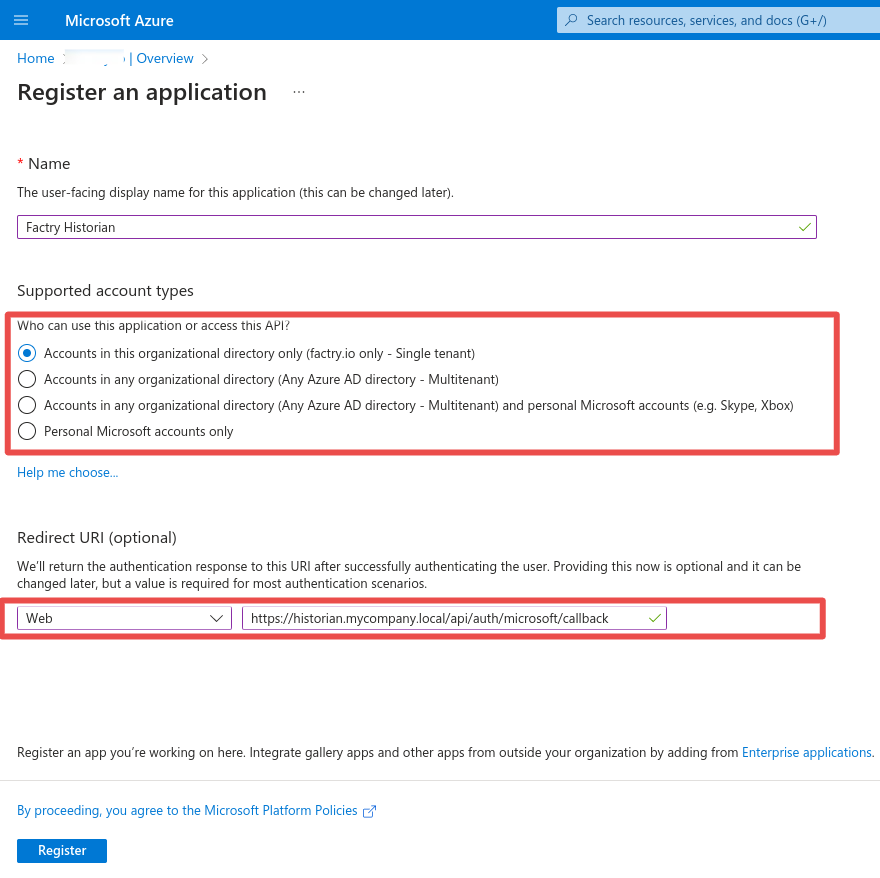
- Fill in the name of the application and select the supported account types (we suggest choosing the first option - Single tenant).
- Fill in the redirect URI being the base URL +
/api/auth/name/callbackand replace name with the name you will give the authentication provider you will configure in Factry Historian. E.g if you name it MyMicrosoft, the redirect URI looks like this:https://historian.mycompany.local/api/auth/MyMicrosoft/callback. - The base URL should be the exact same URL as configured under
Configuration -> Server Settings -> General -> BaseURLin Factry Historian and must be a fully qualified domain name on which the Factry Historian web application is reachable. If the BaseURL setting needs to be changed, a restart of Historian is required for this change to take effect. - When name and redirect URI are filled in, click
Create.

Grafana
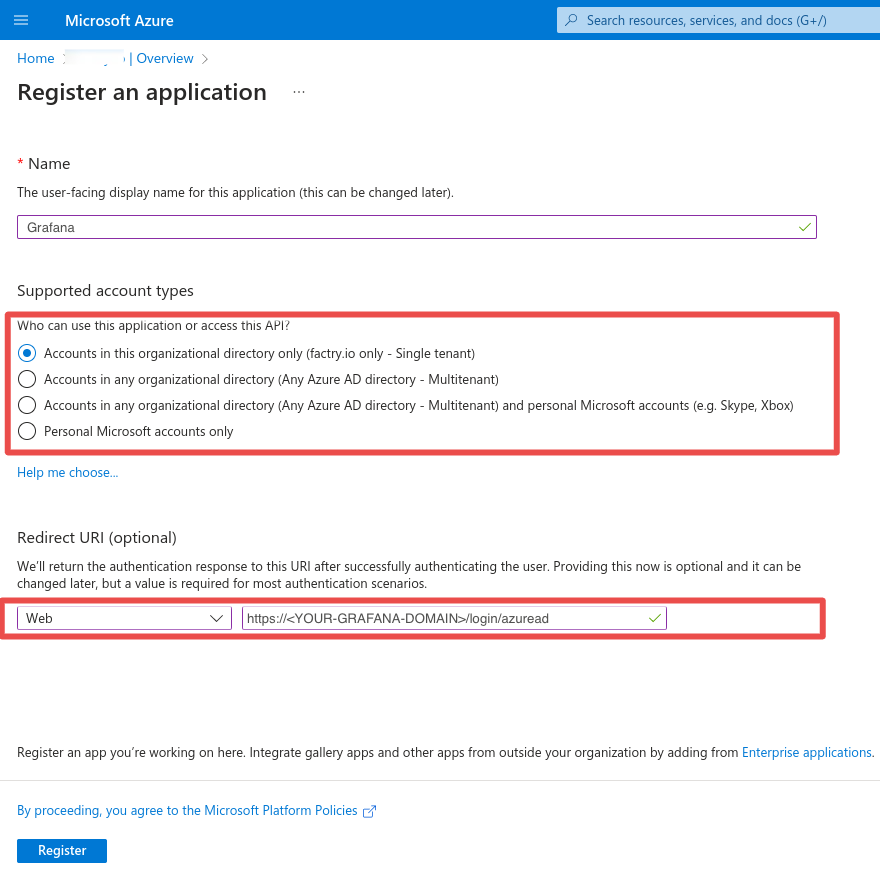
- Fill in the name of the application and select the supported account types (we suggest choosing the first option - Single tenant).
- Fill in the first redirect URI being the root URL +
/login/azureadand the second redirect URI being just the root URL. E.g the redirect URIs might looks like:https://<YOUR-GRAFANA-DOMAIN>/login/azureadandhttps://<YOUR-GRAFANA-DOMAIN>. Replace<YOUR-GRAFANA-DOMAIN>with the fully qualified domain name where your Grafana instance is accessible.Note:This domain should match the root URL Grafana uses (i.e. the root_url setting in grafana.ini file). Make sure this URL is publicly accessible if you’re using Azure AD for user login.
- When name and redirect URI are filled in, click
Create.

Step 4: Application/Directory ID and Client Secret
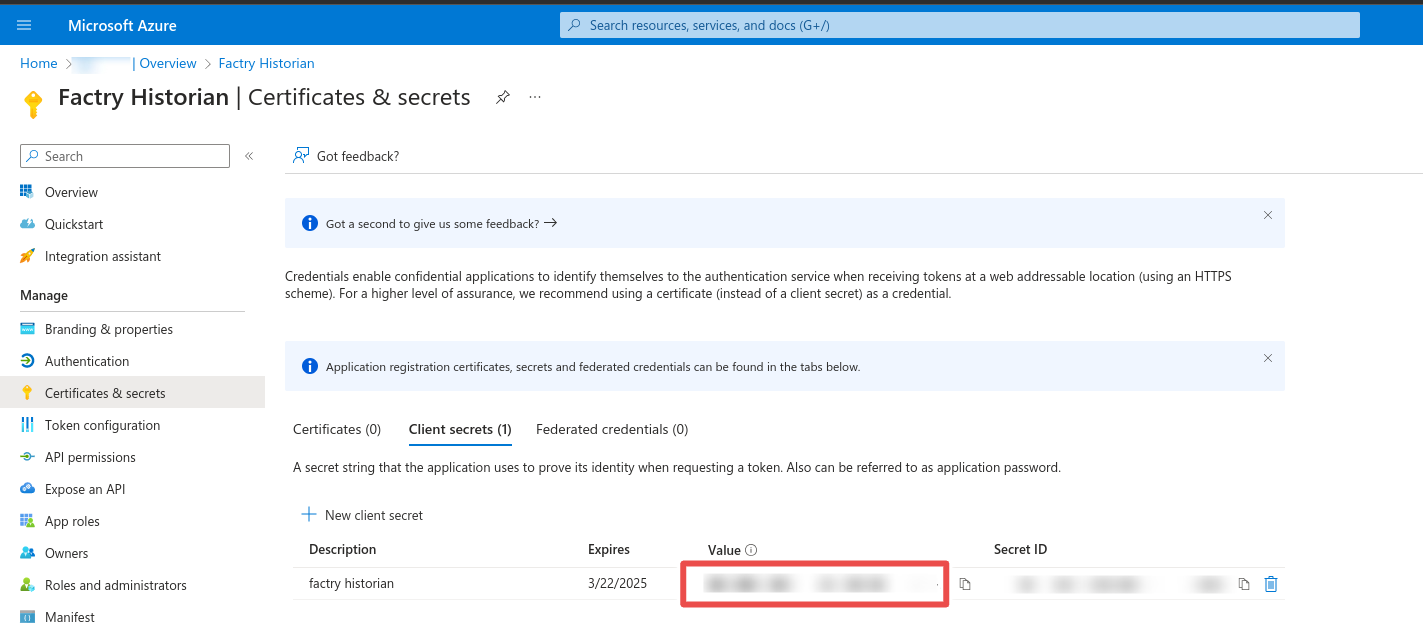
Note the Application (client) ID and the Directory (tenant) ID. These values will be used when creating the authentication provider in Factry Historian/Grafana. Next click Add a certificate or secret. Under client secrets click on New client secret


Step 5: Expiration
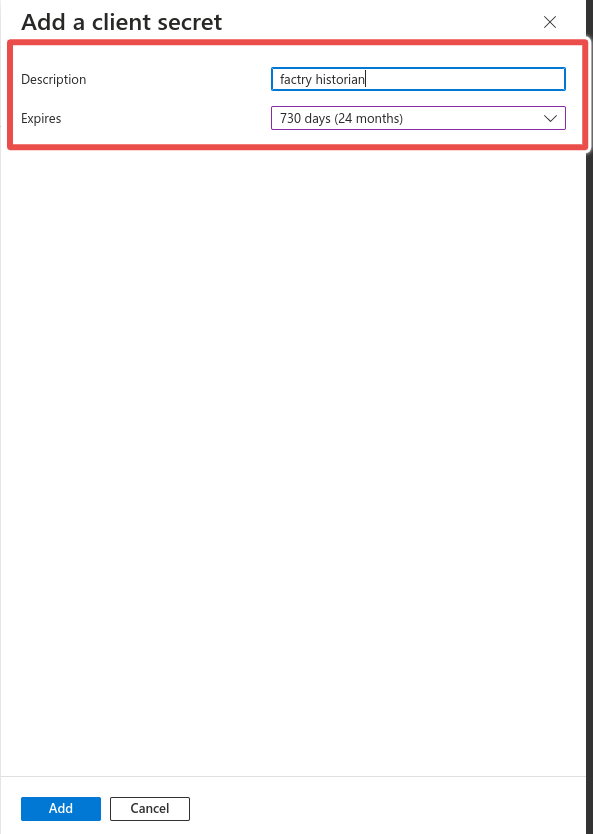
Enter a name and expiration date for the client secret and click Add. Note the value of the generated client secret.

